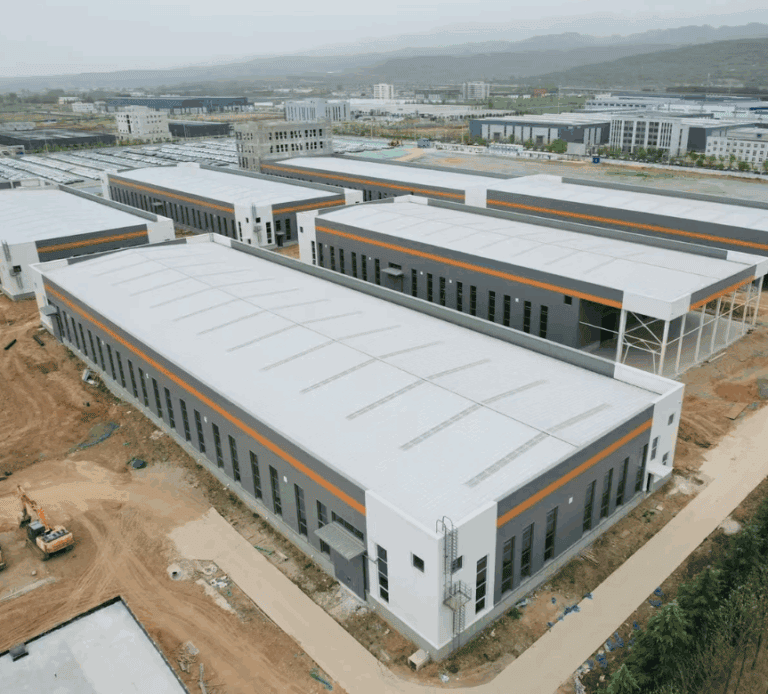
What is a Purlin? A purlin is a horizontal structural beam primarily used in steel construction to support roof or wall panels and distribute loads. In steel structures, purlins prevent roof sagging and help withstand wind, snow, and other external forces. They are typically placed perpendicular to the main rafters or beams and are essential in ensuring the integrity of large-span metal roofs. Without purlins, large metal roofs could collapse under pressure, making them a crucial component of any steel structure.
What to Expect in This Blog:
Ready to learn how steel purlins can transform your next project? Let’s dive in!
What Are Steel Purlins?
Think of steel purlins as the “backbone” of your building’s roof. They are horizontal steel beams that support the roof, transferring its weight to other parts of the structure, like columns and beams. This ensures the roof stays strong and doesn’t sag or bend, keeping your building safe and stable. Steel purlins are usually made from cold-rolled or galvanized steel, which makes them strong, durable, and resistant to rust, so they last for decades.
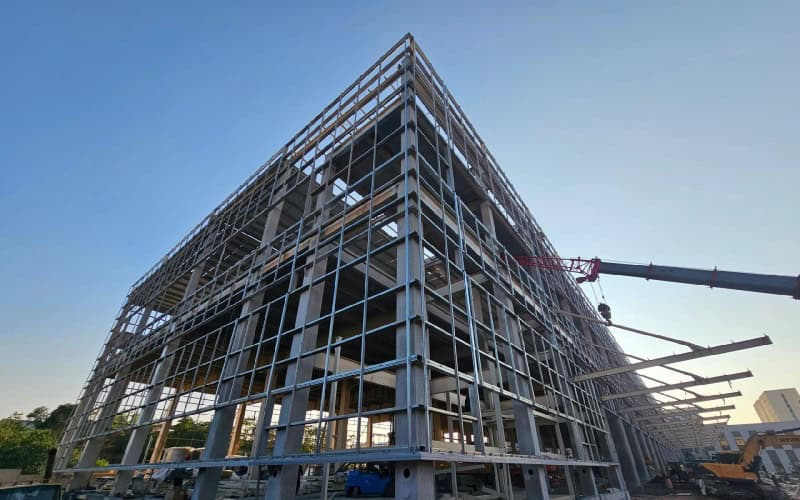
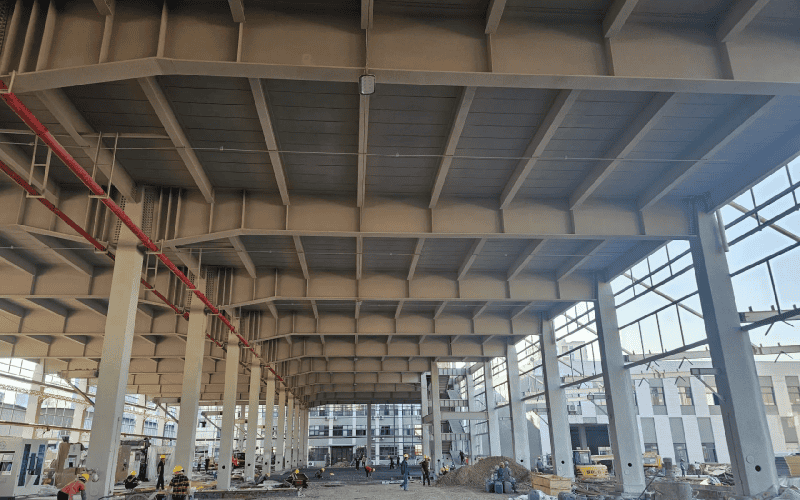
Steel purlins are a key part of what’s called the secondary framing system. This system connects the main structure and includes both purlins (for the roof) and girts (for the walls). Purlins are installed horizontally across the roof, running perpendicular to the main beams. They create a strong support network that evenly spreads the roof’s weight throughout the building. Plus, they provide a solid base for attaching roof and wall materials, like metal panels, ensuring everything stays in place.
Steel purlins don’t just handle the weight of the roof—they also help your building stand up to strong winds, heavy snow, and other weather challenges. Without them, the roof could sag or even collapse, putting the whole structure at risk. That’s why steel purlins are a must-have for any building that needs strength and durability.
Whether you’re building a large factory or a small shop, steel purlins provide reliable support, keeping your building safe and stable for years to come.
Why Use Purlins in Steel Construction?
We’ve talked about how steel purlins act like the “backbone” of your roof, but their role goes even further. Here’s how they make your building stronger, safer, and more cost-effective:
- Evenly Distribute Weight: Steel purlins spread the roof’s weight (and external pressures like wind and snow) across the main structure. This prevents any one area from bearing too much load, which helps your building last longer.
- Add Stability: Steel purlins act like the roof’s skeleton, providing extra support and making the structure more stable. This is especially important in areas with heavy winds or snow, where the roof must handle a lot of pressure without bending or collapsing.
- Save Money: By optimizing the spacing and design of purlins, you can reduce the steel needed for the main structure. This lowers overall construction costs without sacrificing strength.
- Easy to Install: Steel purlins are usually prefabricated and modular, making them quick and easy to install. This saves time on the construction site and reduces the project’s complexity.
What Are the Types of Steel Purlins?
Steel purlins are primarily categorized into two common types based on their cross-sectional shapes, each with distinct advantages for metal roof applications:

C-Purlins:
- Best for small to medium-sized metal roofs
- Works well for simple, non-overlapping installations
- Provides good bending resistance but is limited in long spans
Z-Purlins:
- Recommended for large metal roofs & high wind-load areas
- Allows overlapping connections for stronger joints
- Provides better structural integrity in wide-span applications
Which Purlin Type is Best for Metal Roofs?
- If your project requires a large-span roof or needs better wind resistance, Z-purlins are the better choice because of their ability to overlap and increase strength.
- If your metal roof has a shorter span and you need an easy-to-install solution, C-purlins work well for cost-effective projects.
In addition to C- and Z-purlins, other types such as L-purlins and U-purlins are available on the market. However, C- and Z-purlins are the most widely used. We offer customization for both types in size and thickness to meet the design requirements of different projects.
| Advantages | C-Purlins | Z-Purlins |
| Strength & Load Capacity | Good bending resistance, suitable for small to medium-sized buildings | Superior strength, ideal for large-span or heavy-load buildings |
| Applications | Suitable for shorter spans and regular loads | Suitable for large spans and high-load scenarios |
| Cost | Lower cost, economical | Slightly higher initial cost but reduces long-term maintenance costs through material optimization |
| Ease of Installation | Simple installation, no complex connections required | Overlapping connections improve efficiency but may require more time and labor |
| Connection Method | Used individually, no complex connections needed | Overlapping connections enhance joint strength |
| Wind Resistance | Meets standard wind load requirements | Better suited for high wind load areas |
| Material Optimization | – | Saves material by reducing purlin height and weight |
| Span Capability | Suitable for short to medium spans | Ideal for large-span buildings |
Common Sizes of Steel Purlins
Steel purlins come in a range of sizes to fit different projects. Here are the typical dimensions:
- Height: 4 inches (approx. 100 mm) to 12 inches (approx. 300 mm).
- Width: 1.5 inches (approx. 38 mm) to 4 inches (approx. 100 mm).
- Thickness: Common thicknesses are 12 gauge (approx. 2.7 mm), 14 gauge (approx. 2.0 mm), and 16 gauge (approx. 1.5 mm).
The specific size selection depends on the building’s span, load requirements, and design specifications. Contact us to help you choose the most suitable purlin size for your project—we are fully capable of meeting any custom requirements.
Spacing and Span of Steel Purlins
When designing your steel building, two key terms to know are spacing and span:
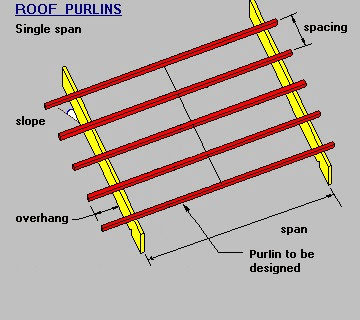
What Is Purlin Spacing?
Purlin spacing refers to the horizontal distance between adjacent purlins on the roof or wall. In simpler terms, it is how densely the purlins are arranged on the roof. The cross-sectional shape of the purlins may be adjusted based on the roof’s slope, but the specific spacing depends on factors such as the roof or wall load, the type of cladding material, and the building’s design specifications. Smaller spacing improves structural stability and load-bearing capacity but may increase material costs.
What Is Purlin Span?
Purlin span refers to the distance between the two support points of a single purlin. In other words, it is the length that the purlin needs to span. It is important to note that the span is not the overall width of the roof but the distance between the bolt centers at both ends of a single purlin. For wider roofs, multiple purlins (and spans) are typically required to provide full support. In such cases, purlins are connected through overlapping to enhance the overall structural stability. The span directly affects the size and thickness of the purlins.
Relationship Between Spacing and Span
Spacing and span are interrelated. Smaller spacing reduces the load on each purlin, allowing for longer spans, while larger spacing requires shorter spans to prevent sagging or deformation. We will consider your specific needs to balance spacing and span, ensuring structural stability and cost efficiency.
Common Structural Layouts of Steel Purlins
The structural layout of steel purlins can vary depending on the type of building and its requirements. Here are some common layouts:
- Single-Span Layout: Purlins are supported directly at both ends by the primary structure. This layout is suitable for small to medium-sized buildings and is cost-effective and simple to construct. However, it is limited by shorter spans.
- Continuous-Span Layout: Purlins extend continuously over multiple support points, making them ideal for large-span buildings. This layout reduces steel usage and improves overall stability by distributing the load across multiple supports. It is suitable for large roofs or complex structures but requires more advanced design and construction.
- Overlapping Layout: Z-purlins often use overlapping connections to enhance joint strength and stability. This method is particularly useful in high-load areas, improving bending resistance and connection strength, especially in long-span or specialized structures.
- Double-Span Layout: Suitable for buildings requiring large spans, each purlin supports two spans, typically between two intermediate supports. This layout is common in long-span roofs and complex structures, such as high-rise warehouses or large industrial facilities.
- Cantilever Layout: In this layout, one end of the purlin is fixed to the primary structure, while the other end is unsupported. It is often used in small buildings or structures with overhangs or extended designs.
- Three-Span Layout: Ideal for extremely large-span buildings, purlins span continuously over three or more supports. This layout is common in high-rise warehouses or large industrial facilities, as it better distributes loads and improves overall stability. However, it requires more complex design and construction.
- Combination Layout: In some complex designs, purlins may use a combination of layouts. For example, single-span and continuous-span layouts may be combined, or different purlin shapes (such as L- or U-purlins) may be used together. This flexible approach meets specific design needs.
- Curved Layout: Steel purlins are not limited to straight layouts and can be designed in curved forms for special roof structures, such as arched or curved roofs. This design is often seen in stadiums or uniquely designed buildings.
- Fully-Spliced Layout: Purlins are fully spliced together using bolts or welding to form a complete support structure. This layout is suitable for buildings requiring extremely large spans, such as airport terminals or exhibition centers.
The specific layout depends on factors such as the building’s span, load requirements, design standards, and cost considerations. We will help you balance structural safety, cost efficiency, and construction complexity to create the optimal design.
Common Connection Methods for Steel Purlins
Properly connecting steel purlins to the main structure is crucial for ensuring stability, load-bearing capacity, and long-term performance. There are three widely used connection methods:
1. Bolted Connections
Best for: Warehouses, industrial buildings, commercial structures
Pros:
- Easy to install and disassemble
- Suitable for prefabricated buildings
- Good structural stability
Cons:
- Requires precise drilling
- May loosen over time under extreme loads
Installation Tip: Use high-strength bolts with locking nuts to prevent loosening under vibration or wind loads.
2. Welded Connections
Best for: Permanent structures, high-load buildings, high-wind areas
Pros:
- High connection strength
- No need for bolts or additional components
- More resistant to wind uplift forces
Cons:
- Requires skilled welders
- Difficult to modify after installation
- Welding can reduce corrosion resistance if not treated properly
Installation Tip: Use anti-corrosion coatings after welding to extend the lifespan of the steel purlins.
3. Clip Connections
Best for: Lightweight structures, temporary buildings, small-span roofs
Pros:
- Quick and easy installation
- No drilling or welding required
- Allows for flexible adjustments
Cons:
- Lower load capacity compared to bolted or welded connections
- May not be suitable for high-wind or heavy-load areas
Installation Tip: Ensure proper alignment and firm locking to prevent displacement under strong winds.
| Connection Type | Installation Complexity | Load Capacity | Wind Resistance | Best Application |
| Bolted | 🔹 Medium | 🔹🔹 Good | 🔹🔹 Good | Warehouses, industrial buildings |
| Welded | 🔸 High (Requires skilled labor) | 🔹🔹🔹 Excellent | 🔹🔹🔹 Excellent | Permanent structures, high-wind areas |
| Clip | 🔹🔹 Easy | 🔹 Limited | 🔹 Low | Lightweight & temporary buildings |
Which Connection Method is Best for Your Project?
- If you need a strong and removable connection, go with bolted connections.
- If you want maximum strength and permanent stability, welding is the best choice.
- If you prefer quick and flexible installation, clip connections are the easiest to use.
Related Reading:
Steel Connections in Steel Structure Buildings: Types, Uses, Design
7 Key Advantages of Steel Purlins
As a critical component of steel structures, steel purlins offer numerous advantages, making them an ideal choice for modern construction projects. Here are seven key benefits:
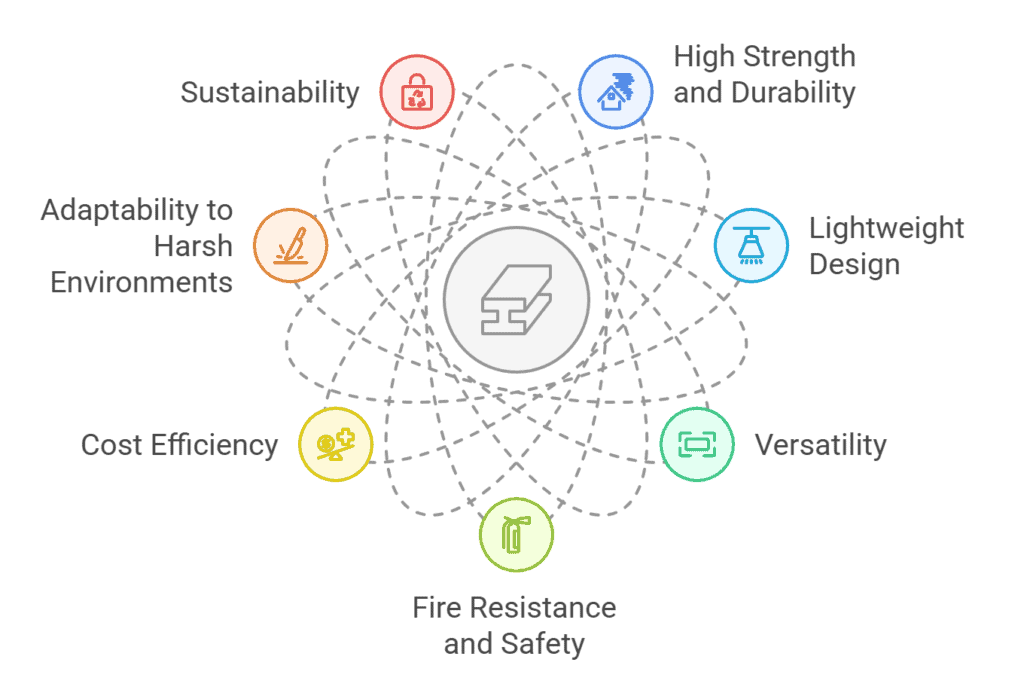
High Strength and Durability
Made from high-strength steel, purlins can withstand heavy loads and extreme weather conditions (such as strong winds or heavy snow). Unlike traditional wooden purlins, steel purlins do not rot, warp, or suffer from insect damage, ensuring a lifespan of several decades with minimal maintenance.
Lightweight Design
Despite their high strength, steel purlins are relatively lightweight. This design not only simplifies transportation and installation but also reduces the load on the building’s overall structure, lowering foundation costs. For example, Z-purlins optimize their cross-sectional shape to reduce weight while maintaining strength.
Versatility
Steel purlins are suitable for various building types, including industrial facilities, warehouses, commercial buildings, and agricultural structures. Whether for large or small projects, steel purlins provide reliable support. Additionally, they can be customized in size and shape to meet specific design requirements.
Fire Resistance and Safety
Steel purlins are made from non-combustible materials, offering excellent fire resistance. In the event of a fire, steel purlins will not burn or release toxic gases, effectively slowing the spread of flames and providing valuable time for evacuation and firefighting. This makes them far safer than wooden purlins.
Cost Efficiency
The design and installation of steel purlins are highly efficient. They are often prefabricated and pre-drilled, allowing for quick installation on-site and significantly reducing construction time. Additionally, their lightweight design and long lifespan help lower overall construction costs.
Adaptability to Harsh Environments
Steel purlins, especially when galvanized or otherwise treated, offer excellent corrosion resistance, making them suitable for high-humidity or salt-rich environments. For example, in coastal areas or chemical plants, steel purlins maintain long-term performance.
Sustainability
Steel is a recyclable material, and steel purlins can be reused at the end of a building’s lifespan, reducing resource waste. Compared to wooden purlins, the production and use of steel purlins have a smaller environmental impact, aligning with sustainable development principles.
We Secure Your Next Successful Project
Now that you know all about steel purlins and their importance in construction, it’s time to take the next step. As key components of steel buildings, purlins play a vital role in ensuring structural stability and efficiency. If you’re planning a new steel construction project, you’ll need a trusted partner to support you.
With over 20 years of experience in steel structure design and manufacturing, we’ve successfully delivered 1,000+ projects worldwide. When you work with us, you’re not just getting a manufacturer or supplier – you’re gaining a dedicated partner committed to standing by your side every step of the way.
What you simply grab in your hands when you work with us:
- One-Stop Service: From design to delivery, we handle it all.
- Dedicated Experts: Your project will be guided by a personal steel structure consultant, ensuring every detail is perfect.
- Free Consultation: Whether you’re ready to start or simply have questions, we’re here to help – no strings attached.
- AND MORE!
Don’t wait to bring your vision to life. Contact us today for a free quote or consultation. Let’s build something amazing together!