As cities look for smarter, greener transit solutions, solar bus shelters are emerging as a future-proof upgrade to traditional infrastructure. But what does it actually take to build one—from the steel frame to the solar panels, and all the way to installation?
If you’re planning or evaluating a solar shelter project, this guide gives you a clear, step-by-step breakdown of the full manufacturing process. You’ll learn what materials are used, how components fit together, and what it takes to install and maintain a shelter that’s truly off-grid, safe, and built to last.
By the end, you’ll be better equipped to assess feasibility, timelines, and technical requirements—whether you’re sourcing one shelter or scaling city-wide.
What to Expect in This Blog:
What Exactly Is a Solar Bus Shelter?
A solar bus shelter is more than just a place to wait for the bus. It’s a smart, self-powered structure that combines shade, seating, and lighting—often without needing a connection to the grid.
Unlike traditional shelters, solar bus shelters integrate photovoltaic (PV) panels, usually installed on the roof. These panels collect sunlight during the day and convert it into electricity, which powers built-in LED lights and sometimes other features like digital displays or security cameras.
This type of shelter is especially useful in areas where running power lines is expensive or impractical. It’s also a good choice for cities aiming to reduce energy use and lower carbon emissions.
In short, it offers protection from the weather, improves nighttime visibility, and supports sustainability—all in one integrated design.
What Are the Main Components of a Solar Bus Shelter?
To understand how a solar bus shelter works, it helps to first break down what it’s made of. Each part has a clear function—and together, they create a shelter that’s both practical and energy-efficient.

Here are the key components you’ll typically find:
- Steel Structure
This is the main frame of the shelter. It supports everything else—roof, panels, seats—and must be strong enough to handle wind, rain, and long-term outdoor exposure. - Solar Panels
Usually mounted on the roof, these photovoltaic (PV) modules capture sunlight and generate electricity. Most systems use monocrystalline or polycrystalline panels for reliable performance. - Battery Storage
Power generated during the day is stored in deep-cycle batteries. This ensures the shelter stays lit even at night or on cloudy days. - LED Lighting
Energy-efficient LED lights are often installed in the roof or side beams. They improve safety and visibility for passengers, especially in low-light conditions. - Seating and Side Panels
These provide comfort and protection from wind or rain. Materials may include polycarbonate sheets, tempered glass, or metal mesh—depending on design and local weather needs. - Optional Smart Features
In some cases, shelters include USB charging ports, Wi-Fi, real-time bus arrival displays, or CCTV for security. These features depend on budget, location, and project scope.
Each part is carefully designed to work together. The solar power system feeds the lights and any electronics, while the structure itself ensures safety and weather resistance. Whether you need a basic shelter or a smart one, the core components stay the same—the difference lies in how you configure them.
What Materials Are Typically Used for Solar Bus Shelters?
Materials matter—not just for how the shelter looks, but for how well it performs over time. Since solar bus shelters are installed outdoors and exposed to all kinds of weather, every material used must balance durability, safety, and maintenance ease.
Let’s look at the main categories of materials and why they’re chosen:
Structural Frame: Steel or Aluminum
The core structure is usually made from galvanized steel or powder-coated steel. These finishes protect the metal from rust, especially in coastal or high-humidity areas. Some lighter designs use aluminum for easier transport and corrosion resistance, but steel remains the most common choice due to its strength and cost-effectiveness.
Roofing and Side Panels
The roof often supports solar panels, so it needs to be both strong and lightweight. Common options include:
- Polycarbonate sheets – lightweight, UV-resistant, and impact-resistant
- Tempered glass – offers a more premium look and good weather resistance
- Aluminum composite panels (ACP) – durable and easy to work with
Side panels—if included—use similar materials, chosen based on climate and safety concerns (e.g., shatter-resistance in public spaces).
Solar System Components
For the solar system itself:
- Solar panels are typically monocrystalline (high efficiency) or polycrystalline (more budget-friendly).
- Batteries are often sealed deep-cycle lead-acid or lithium types, depending on project specs.
- Wiring, junction boxes, and controllers must all be weather-rated (usually IP65 or higher).
Seating and Fixtures
Benches are often made of metal, fiberglass, or wood-plastic composites—materials that resist wear and vandalism. All fasteners and hardware should be stainless steel to prevent rust over time.
How Is a Solar Bus Shelter Manufactured Step by Step?
A solar bus shelter is not just built—it’s carefully engineered, fabricated, and assembled through a series of controlled steps. Here’s how the process typically works:
1. Design and Engineering
It all begins with the design. Based on your project requirements—such as shelter size, solar capacity, wind load, or digital features—engineers create structural drawings and solar layouts. If you’re using a standard model, this phase is fast-tracked. For custom designs, more time is needed for structural calculations and client approvals.
2. Steel Fabrication
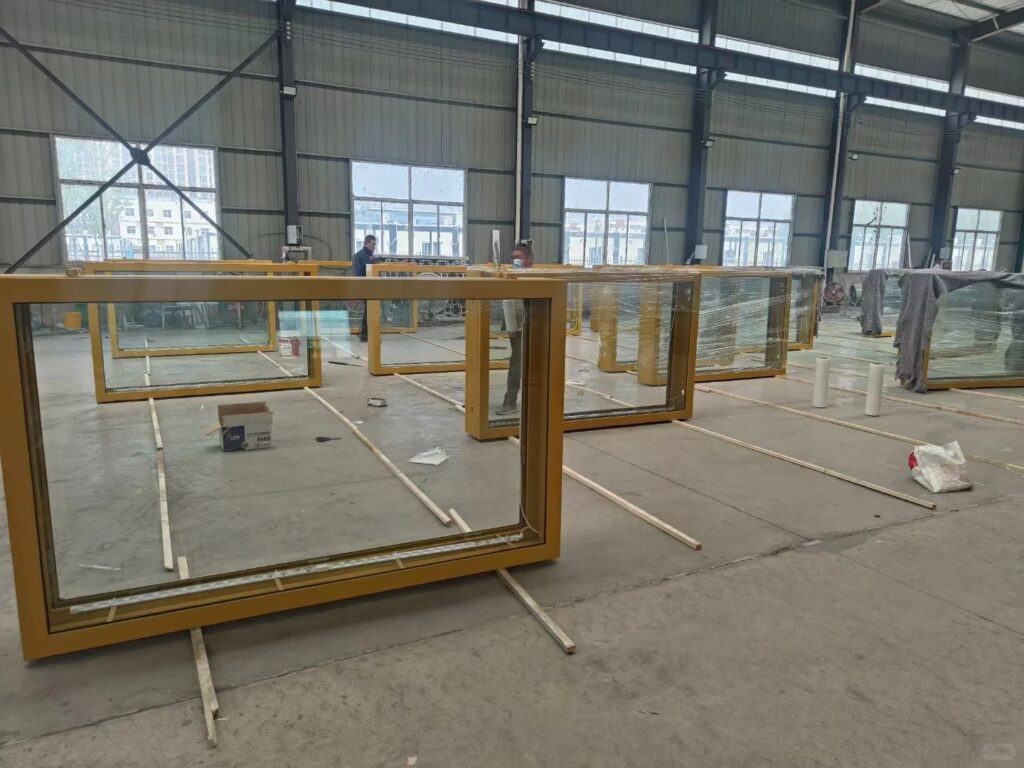
With the design finalized, the structural components—columns, beams, roof frames—are fabricated using pre-selected materials such as galvanized or powder-coated steel. Parts are cut, drilled, and welded to spec. If the shelter is modular, it’s built for easy bolt-connection assembly on site.
3. Surface Treatment
All steel parts go through surface protection to ensure long-term durability. This typically includes hot-dip galvanizing or powder coating, depending on the environment the shelter will be placed in (e.g., coastal, high humidity, urban).
4. Solar System Integration
Next, the solar system is prepared. Solar panels are matched with battery units, and key electrical components like wiring, controllers, and LED lights are installed—either in-factory or prepared as plug-and-play kits. Smart features such as CCTV or real-time display mounts may also be included if specified.
5. Pre-Assembly and Quality Check
Before shipment, the structure is partially assembled for quality control. This includes dimensional checks, surface finish inspection, and testing of all electrical functions. This step helps ensure smooth, error-free installation at the project site.
6. Packaging and Delivery
Once approved, the shelter is disassembled into modules or flat-packed, clearly labeled, and packaged for transport. Delivery is planned to match your installation schedule, and assembly guides are included—or on-site support can be arranged as needed.
Depending on the complexity and volume, this entire process typically takes 3 to 6 weeks from final design approval to delivery.
Standardized shelters may move faster, while fully customized models might require more time for detailing and validation.
How Is a Solar Bus Shelter Installed on Site?
The true advantage of a solar bus shelter lies not only in its design—but in how quickly and cleanly it can be installed. For most projects, installation takes just a few hours once the site is ready.
Here’s what the process usually looks like:
1. Site Preparation
Before delivery, the project site needs to be prepared. This typically includes:
- Foundation or anchoring base – either concrete footings, embedded bolts, or pre-cast bases
- Level ground surface – to ensure safe and accurate installation
- Conduits or wiring paths – if the system is grid-connected or includes additional data lines
For off-grid shelters, no power connection is needed, which simplifies site work.
2. Structure Assembly
Once the components arrive, the shelter frame is assembled on-site—usually by a small crew using basic lifting equipment and hand tools. Thanks to modular fabrication, most parts connect via bolts and pre-drilled slots, reducing the need for welding or heavy machinery.
Shelters are typically assembled from the ground up:
- Main frame (columns and beams)
- Roof and panel system
- Seating and side enclosures
Depending on the model, this phase can take 4 to 8 hours.
3. Solar and Electrical Setup
After the frame is in place, the solar system is installed:
- Panels are mounted onto the roof structure
- Batteries and controllers are fixed in weatherproof enclosures
- Wiring and lighting are connected—often via pre-routed channels or quick connectors
Once connected, the system is tested to ensure lights function correctly and batteries charge as expected.
4. Final Checks and Handover
A final inspection is carried out to confirm structural alignment, safety clearances, and system performance. From there, the shelter is ready for public use—no extra power supply or major civil work required.
In most cases, the entire installation—from unloading to handover—can be completed within one working day, provided the site is ready and weather conditions allow. For larger deployments or shelters with smart systems, additional time may be needed for configuration or testing.
What Standards or Certifications Should It Meet?
When planning to install a solar bus shelter, compliance isn’t optional—it’s essential. Authorities often require shelters to meet both structural and electrical standards before they can be approved for public use.
Here are the main categories to consider:
Structural and Wind Load Standards
The shelter must be able to withstand local environmental conditions, including high wind, rain, snow, and seismic activity (if applicable). Typical standards include:
- Local building codes – these vary by country or region
- Wind load and structural safety – shelters are often designed to meet wind speeds of 100–150 km/h or more, depending on site location
- Material compliance – use of certified steel (e.g., Q235, ASTM A36) and safety glass (e.g., tempered or laminated)
If the shelter is to be installed in coastal or cyclone-prone areas, additional reinforcement or design modifications may be required.
Electrical and Solar Compliance
Solar shelters that include lighting, battery systems, or smart electronics must meet electrical safety standards, such as:
- IEC standards for solar systems – including PV module quality, wiring, and grounding
- Battery safety – often following UN38.3, IEC 62133, or similar standards for lithium systems
- Lighting systems – low-voltage LED systems may fall under IP65/IP66 waterproofing and RoHS compliance
In grid-connected installations, utility approvals or electrical permits may also be required.
Transportation and Public Safety Guidelines
In some regions, public infrastructure like bus shelters must also comply with:
- Accessibility regulations (e.g., wheelchair space, signage height)
- Fire safety codes for urban infrastructure
- Anti-vandalism or tamper-resistant design in high-traffic areas
Local transit authorities may issue their own specifications—especially in public tenders—so it’s important to review these during the planning stage.
Documentation and Certification Support
A professional supplier should be able to provide:
- Structural calculation reports
- Material certificates (steel, glass, etc.)
- Solar and battery specs with test certifications
- Installation manuals and warranty documents
These documents are often required for permit approval or third-party inspection, especially in government-funded projects.
If you’re unsure which standards apply to your location, it’s best to consult with your local planning authority early. A well-prepared compliance package not only speeds up approval—it also builds trust with stakeholders.
What Are the Common Challenges in Making or Installing One?
Even with a streamlined design and modular system, solar bus shelters come with a few common challenges—especially when scaling up or working in complex environments. Knowing them in advance helps you plan better and avoid unnecessary delays.
1. Site Conditions and Civil Works
Some sites are harder to prepare than others. Uneven ground, poor drainage, or lack of foundation access can slow down installation.
Tip: A quick site survey during the planning phase can prevent surprises. Pre-cast foundations or adjustable base plates can also help reduce civil work time.
2. Logistics and Transportation
Shelters are large structures, even in modular form. Transporting them to remote or congested urban areas can require careful coordination—especially if multiple units are delivered at once.
Tip: Flat-packed or knock-down designs can significantly reduce shipping volume. Work with a supplier experienced in export packing and delivery routing.
3. Balancing Cost and Customization
Many clients want custom features—like branding, digital displays, or smart functions—but these can quickly increase complexity and lead time.
Tip: Start with a base model that meets core needs. Add-ons can often be phased in later, depending on budget and approvals.
4. Weather and Installation Delays
Rain, extreme heat, or strong winds can delay on-site work, especially when working with electrical components or anchoring systems.
Tip: Plan installations during stable weather windows if possible. Most shelters can be assembled in less than a day, so clear coordination helps minimize weather impact.
5. Regulatory or Approval Bottlenecks
In some areas, obtaining permits or meeting public safety codes can take longer than expected—especially for solar or smart-connected shelters.
Tip: Engage local authorities early in the design process. A supplier who provides full documentation (drawings, certificates, reports) can help smooth the approval path.
Most of these challenges are manageable with good planning and the right partners. The key is to treat the shelter not just as a product—but as a small infrastructure project, with its own timeline, stakeholders, and requirements.
Conclusion: More Than a Shelter—It’s a Scalable, Sustainable Solution
A solar bus shelter may look like a simple structure—but now you’ve seen what really goes into it: engineered steel, integrated solar power, modular design, precise fabrication, and efficient on-site installation. Every component, every step, is about delivering a structure that’s not only functional, but future-ready.
Whether you’re planning a pilot installation or scaling across a city, the key takeaway is this: a well-built solar shelter isn’t just an add-on to your public space—it’s an energy asset, a safety feature, and a signal of smart urban thinking.
If you’re ready to turn public infrastructure into sustainable impact, the next step isn’t complex. It’s structured, proven, and scalable. You just need the right partner to make it happen.
Ready to Bring Smarter Transit to Your City?
You’ve seen what goes into a solar bus shelter—now let’s build one for your project.
Whether you’re planning a single unit or a city-wide rollout, we offer durable structures, custom designs, and full technical support from design to installation. No guesswork. No delays. Just clean, efficient infrastructure—built to last.
- Free consultation on structure, layout, and solar integration
- Fast lead times with modular production and global shipping
- Compliance-ready designs for public tenders and smart city upgrades
Let’s make your next transit project smarter, safer, and solar-powered.
Learn more about our Solar Bus Shelter Structures
or Contact our engineering team

