Imagine transforming a simple shipping container into a sustainable, thriving farm — it’s not a futuristic concept but something that’s possible today. Whether you’re looking to grow fresh produce year-round in a limited space or explore a new business venture in agriculture, container farming is a practical and innovative solution. The beauty of it? It’s adaptable to virtually any environment, from urban rooftops to remote rural areas, making it a versatile choice for anyone with a green thumb.
Constructing a shipping container farm could appear intimidating, particularly if you are not acquainted with the technical aspects involved. The positive information? It’s more straightforward than you might imagine. This tutorial will guide you through all you need to understand, from picking the appropriate container to establishing a hydroponic system that fosters effective plant development. Let’s break it down and show you how this modern farming method can work for you.
What is Container Farming?
Container farming, also called shipping container farming, involves growing crops inside repurposed containers with hydroponic or aeroponic systems. These systems create controlled environments for year-round crops like leafy greens, herbs, and fruits.
It’s a flexible and sustainable method, perfect for urban or rural spaces. You can grow fresh produce in small areas like rooftops or vacant lots, using less water and no pesticides. Whether you’re starting a hobby farm or a small business, container farming is ideal for those with limited land but a passion for sustainable agriculture.
In addition to the shipping container, you’ll require essential gear such as illumination, irrigation systems, air circulation, and climate regulation to establish the ideal growing environment.
The Benefits of Shipping Container Farming
Container farming offers several distinct advantages, making it an ideal solution for modern agriculture. Here’s why it stands out:
- Year-Round Production: With a controlled environment, you can grow crops no matter the weather. This consistency leads to continuous harvests and reliable yields throughout the year.
- Space Efficiency: A single 20ft container can yield as much as an acre of traditional farm land. Vertical farming and stacking containers allow you to grow in urban areas like rooftops or vacant lots, making it perfect for limited space.
- Sustainability: Hydroponic systems use 90% less water compared to traditional farming, and the closed environment reduces the need for pesticides, leading to pesticide-free crops. It constitutes a greener approach to cultivating food.
- Scalability: Container farming can easily scale from one unit to many. By stacking or connecting containers, you can grow your operation as needed, perfect for expanding your farm or business.
- Flexibility: Containers can be placed anywhere, from cities to remote areas, and are easily moved. This makes them ideal for changing locations or adapting to market opportunities.
- Cost-Effectiveness: Setting up a shipping container farm is more affordable than traditional farming, with minimal land preparation and lower water usage. This keeps operational costs low, making it ideal for small businesses or entrepreneurs looking to start an agricultural venture without a high upfront investment.
In short, container farming offers a flexible, sustainable, and space-efficient way to grow food, whether for personal use or as part of a business.
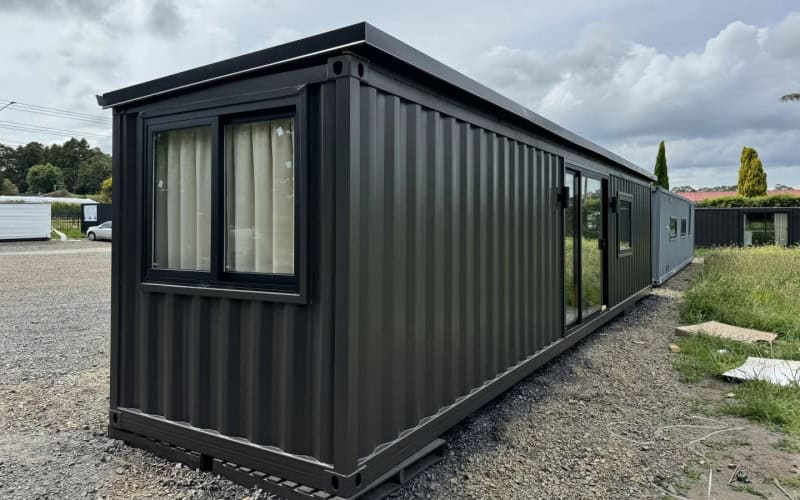
Choosing the Right Shipping Container for Your Farm
Choosing the appropriate shipping container is crucial for establishing a thriving farm. Certainly, let’s examine the key considerations.
Size Matters
When choosing a container, size directly affects the space and scalability of your farm. A 20ft container is great for small operations, while a 40ft container doubles the space. If you’re planning to grow vertically, a high-cube container (9’6″ height) gives you more room to stack crops, making it ideal for vertical farming setups.
Condition: New or Used?
Containers come in two main conditions: new or used. Fresh containers have a higher price tag but lack structural problems, guaranteeing an extended durability. Used containers offer significant savings but require more careful inspection. Check for rust, dents, and structural weaknesses, particularly the floor and walls, as these can affect your farm’s overall stability and modifications.
Insulation and Weatherproofing
For optimal crop growth, insulation is crucial, especially if you’re setting up a hydroponic system. Adding insulation to your container aids in sustaining a consistent internal temperature, minimizing heat escape and moisture accumulation. This is particularly vital if you are operating in an area with fluctuating weather patterns.
Accessibility and Location
Think about where you’ll place your container farm. Does it have enough space for the farm’s workflow? Can you access it easily for maintenance, harvesting, and checking systems? Also, consider its proximity to utilities like water and electricity, which are essential for running hydroponic systems or other farming technologies.
Key Features to Look For
Not all containers are created equal. Look for containers that are free from excessive rust, with a solid floor and no structural damage. These attributes are vital when undertaking alterations such as incorporating insulation, ventilation, or illumination systems. The better the container, the easier and safer your setup will be.
Selecting the appropriate shipping container involves taking these elements into account. With the right container, you can create an efficient and sustainable farm setup that meets your specific needs.
How to Set Up a Hydroponic System in a Shipping Container
Hydroponic farming allows you to grow crops faster while using less water compared to traditional soil-based farming. This method is perfect for a DIY shipping container farm, where maximizing space and resources is key. It eliminates the need for soil and creates a controlled environment, making it ideal for small spaces like shipping containers.
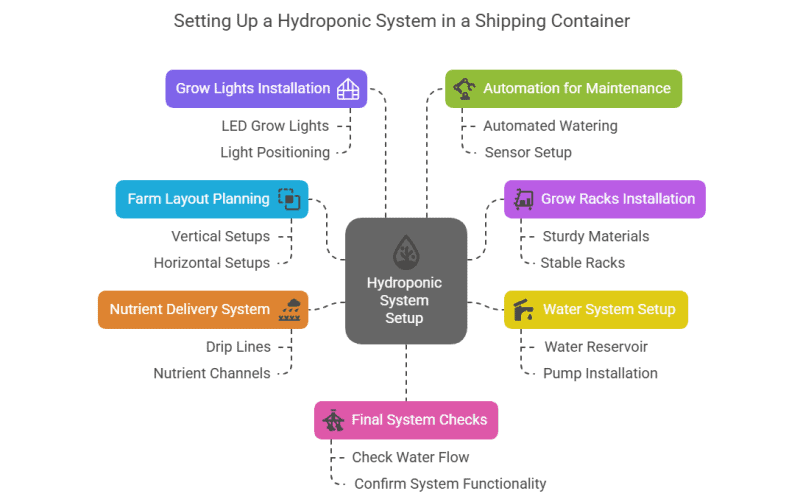
Step 1: Plan Your Farm Layout
Before starting your DIY shipping container farm, plan how to utilize the available space. Vertical setups are best for compact crops like leafy greens, while horizontal setups provide more space for larger crops like tomatoes. Ensure sufficient space is allocated for upkeep, harvesting activities, and system inspections. If you don’t properly plan for workflow, it can make your farm difficult to manage. Don’t underestimate the space needed for easy access—you’ll need room to move, check systems, and ensure everything is working.
Step 2: Install Grow Racks and Shelving
In your shipping container farm, vertical racks or towers are crucial for maximizing space. Opt for robust materials capable of supporting the load of vegetation and irrigation systems. For crops like basil or lettuce, vertical farming lets you stack plants, allowing sunlight to reach each layer. Always ensure racks are stable and secured to avoid accidents. One challenge with vertical systems is ensuring that water flow reaches all layers evenly. To avoid this, check the alignment and placement of your racks before installation.
Step 3: Set Up Water Tanks and Pumps
Water is vital for hydroponic agriculture. Set up a water reservoir large enough for your system’s needs. Install pumps that circulate water evenly and without excess pressure, making sure that each plant receives consistent nutrients. Obstacles encompass water flow obstructions or pumps that are either insufficiently potent or overly strong for your setup. To prevent this, ensure the pump size is suitable for your container’s design and the type of hydroponic system you’re using.
Step 4: Connect Nutrient Delivery Systems
Once your water system is set up, you’ll need a nutrient delivery system. Depending on the hydroponic setup you’ve chosen, you’ll install drip lines or nutrient channels to deliver nutrients directly to the plant roots. Make sure the system is level and nutrient flow is consistent. Uneven nutrient delivery can lead to inconsistent growth. Always test the system before planting and adjust if needed.
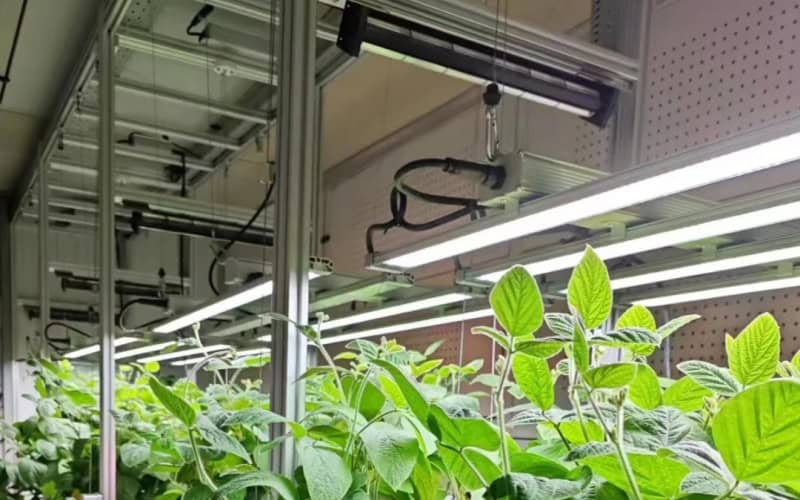
Step 5: Install Grow Lights
Since you’re working indoors, LED grow lights are necessary to provide the light spectrum plants need for photosynthesis. Position lights so they cover the full growing area, especially if you’re using vertical farming systems. Improper light positioning can result in some plants not getting enough light, affecting growth. Always double-check your light setup to ensure even distribution, especially in stacked systems.
Step 6: Automate for Easy Maintenance
Automation is a huge advantage in DIY container farming. Install automated irrigation systems to guarantee that your plants receive nutrients precisely when required. Sensors for temperature, humidity, and pH regulation can ensure that the environment remains consistently ideal. A common challenge is ensuring that the automated systems are calibrated correctly, which could lead to over or under-watering if not done properly. Test the automation thoroughly before leaving it to run on its own.
Step 7: Perform Final Checks
Before planting, double-check the entire system. Ensure water flows smoothly, nutrient delivery is functioning well, and lights are correctly positioned. Check for any leaks, and confirm everything is set up to work seamlessly. A missed leak or faulty pump can cause significant problems, so make sure everything is secure before introducing your plants. Once all systems are working, you’re ready to plant your crops in your DIY shipping container farm.
Expert Tip: Successful hydroponic farming in a shipping container relies on careful planning, precise setup, and regular monitoring. With a solid system in place, you’ll see consistent and healthy crops year-round.
DIY vs. Professional Container Farms: What’s the Best Option for You?
Choosing between a DIY and a professional container farm depends on your resources, expertise, and goals. Both have unique advantages, so let’s break down what each option offers and help you decide which fits best with your needs.
The Pros and Cons of a DIY Shipping Container Farm
Building your own container farm offers great flexibility but also presents challenges. Below is a concise summary of the main benefits and drawbacks:
Pros:
- Complete Control: You design your farm, from layout to hydroponic systems, tailored exactly to your needs.
- Lower Initial Investment: DIY often means fewer costs upfront since you can source materials and tools yourself. But be mindful—there might be hidden expenses down the road.
Cons:
- Requires Knowledge and Time: Without experience, setting up a farm can be tricky. You’ll need to learn about systems, and that takes time.
- Risk of Errors: One wrong step in setup could lead to bigger issues down the line—costing you crops and money.
In short, a DIY farm gives you freedom but requires a solid understanding of the setup and maintenance processes.
Why You Might Want to Consider a Professional, Pre-Built Container Farm
While DIY farming is hands-on, a professional container farm offers ease and efficiency. Here’s the reason why you could potentially go for this option:
| Benefit | Why It’s Good |
| Quick Setup | Get your farm running fast with professional installation. |
| Professional Design | Expert systems designed for maximum efficiency and productivity. |
| Low Risk | No need to worry about mistakes. Professionals handle it all. |
A pre-built container farm ensures you hit the ground running. Plus, the design is optimized for sustainability and maximum yield, giving you peace of mind.
Consequently, which path should you opt for? Here’s a simple guide to help you come to a conclusion:
- Skill Level: Are you comfortable with the technical side of farming and construction? If not, go professional.
- Budget: DIY might seem cheaper, but unexpected costs could sneak up. Weigh the upfront savings against potential repairs.
- Timeline: Want to start growing ASAP? A pre-built farm is your best bet. DIY projects, on the other hand, take time to set up.
Ultimately, your decision should align with your resources, timeline, and willingness to take on the DIY challenge. Whether you go DIY or choose a professional setup, both options offer exciting opportunities for sustainable farming.
FAQ About Shipping Container Farm
1. What kind of maintenance does a shipping container farm require?
Regular maintenance is key to long-term success. You’ll need to monitor the water systems, replace faulty grow lights, and keep the ventilation systems clear to prevent mold and ensure proper airflow.
2. How can I scale my shipping container farm?
Start with one container to test your systems, and as you grow, add more containers. Optimize the space with vertical farming or connecting units to increase crop yield without expanding your footprint.
3. Are there any legal or zoning regulations I should be aware of when setting up a container farm?
Be certain to review regional zoning statutes and construction regulations, since certain zones might necessitate licenses for farming purposes. You will need to verify that your container farm is permissible in your area prior to commencing.
4. What is the cost of setting up a shipping container farm?
The expenditure involved in establishing a shipping container farm may vary from 3,000to12,000, contingent upon the dimensions of the container and the alterations required. Ongoing costs for water, electricity, and maintenance can run between $200 and $500 per month.
Conclusion: Building a Sustainable Future with Shipping Container Farms
Container farming offers a sustainable, space-efficient, and cost-effective solution for modern agriculture. It allows year-round production with minimal land use, making it an ideal option for both urban and rural environments.
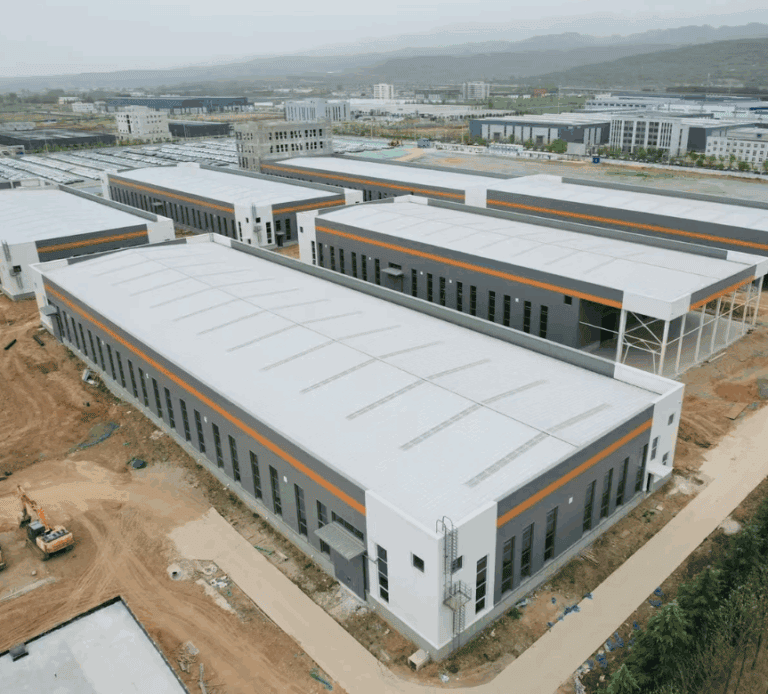
As a steel structure manufacturer, we specialize in creating durable, insulated containers tailored to your agricultural needs. Our containers can be customized to fit your farm’s specific layout, whether for growing, livestock, or storage. With precise space planning and high-quality insulation, we ensure optimal growing conditions and energy efficiency, helping you minimize operational costs and maximize productivity.
Ready to build your container farm? Contact us today to learn how we can design and deliver the perfect container for your agricultural project, ensuring a seamless setup and quick path to production.
Interested in learning more about container safety? Check out our article on Are Shipping Containers Fireproof? Truth, Risks, and Real-World Fire Safety Solutions, where we dive into the fire safety aspects of using shipping containers and how to ensure the safety of your farm.