Imagine owning a home that’s affordable, eco-friendly, and ready in months—not years. For a growing number of people worldwide, shipping containers now offer this tantalizing promise. With housing costs soaring 42% since 2020 and climate concerns reshaping priorities, these steel boxes have evolved from industrial relics into symbols of modern, minimalist living. But here’s the catch: Can a structure designed for cargo truly become a safe, comfortable haven?
For those diving into a DIY container home project, the answer lies in the details—from structural planning to insulation and layout decisions. As a trusted partner in steel construction, we’ve witnessed both the excitement and frustration of container projects. Many clients start with visions of quick, budget-friendly builds, only to discover unexpected hurdles—permits delayed by zoning laws, insulation costs doubling estimates, or designs needing structural reinforcements. In this guide, we’ll walk you through 10 complete steps that cover everything from design to final inspection. With practical advice and real-world experience, you’ll be better prepared to build a container Home that’s not only stylish but built to last.
What This Article Covers
Step 1: Budget and Design – Think Beyond the Box
A strong start begins with the right plan. Choose between new or used containers—new ones are clean but costly, while used units may have dents, rust, or chemical residue that need time and money to fix.
Design goes beyond layout. Think about natural light, container placement, and structural flow—but also check local codes for fire safety, earthquake resistance, and building height limits. These vary by location and can directly affect what’s allowed. If you’re new to this, tools like SketchUp or Planner5D are great for visualizing layout and structure before you commit.
Plan waterproofing and drainage from day one—poor drainage is one of the most common problems we’ve seen during retrofits. And always get a land survey. You’ll need to know:
- Is the soil strong enough to hold containers?
- Is the slope manageable for your foundation?
- Can delivery trucks access the site?
Lastly, keep a 10–15% contingency fund. We’ve seen clients caught off guard by crane rentals, cutting errors, or insulation upgrades. A little buffer goes a long way.
Before locking in your design, it’s worth understanding the full cost range of container housing. From basic shells to luxury finishes, how much are container homes can vary more than you think.
Step 2: Permits and Planning – Don’t Skip the Paperwork
Permits aren’t glamorous, but they’re what turns your design into a buildable home. Start with zoning, building, and utility permits—and check if your area treats containers as permanent or temporary structures. In residential zones, zoning reviews can take 4–8 weeks. Submitting stamped engineering plans early can help speed things up.
Container types sell fast. If you switch models—say, from a 40ft high cube to two 20ft units—you’ll need to update your layout, foundation plan, and fire safety notes quickly. Submit revisions within 72 hours to avoid multi-week delays.
Some counties take up to 30% longer to approve container homes. So don’t schedule delivery until permits are in hand—storage fees add up fast. And don’t forget:
- Run a soil test early—missing one can derail your approval.
- Check HOA rules—some restrict exterior finishes.
- Stay on top of inspections—a failed rough-in can cost $400+ to fix.
Permitting may be slow, but skipping steps here can stall your entire build.
Zoning laws vary widely across the U.S.—some counties embrace container builds, while others restrict them entirely. To avoid surprises, check out what states allow container homes before you buy land.
Step 3: Buying Your Containers – Wait Until the Time is Right
Don’t buy containers before your permits are approved. Local codes may require specific features—like welded seams or certified corner castings—and retrofitting later can cost hundreds per unit. We’ve seen buyers spend over $2,000 fixing containers that didn’t meet stacking requirements.
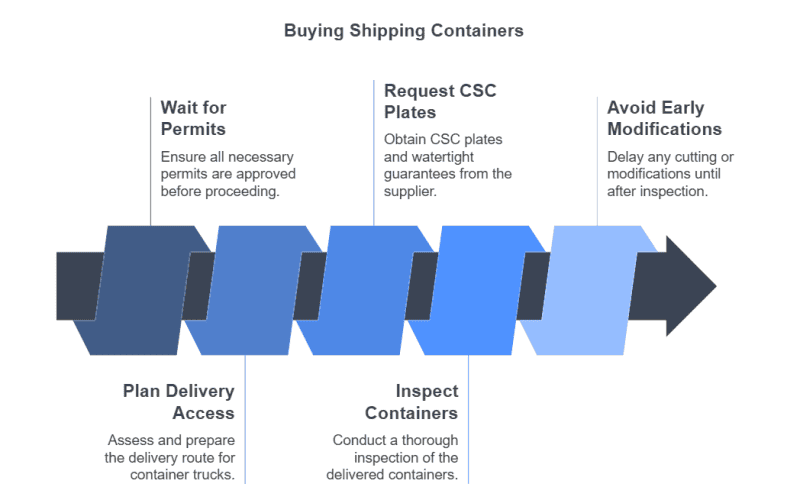
Delivery matters just as much. A 40ft container needs wide turns and firm ground—soft soil can sink heavy trucks. Plan for access and, if needed, rent steel plates to stabilize the path.
Make sure to request CSC plates and watertight guarantees from your container supplier—these confirm structural integrity and help avoid costly surprises later. If you’re stacking, check for ISO 1496 certification and inspect the corner posts carefully—even light rust can reduce strength by up to 30%.
As a container building specialist, we always suggest holding off on any cutting or modifications until after the container is delivered and inspected. Making changes too early can lead to structural issues or limit your options if the container needs to be exchanged.
Step 4: Land Preparation – Start from the Ground Up
If you’re building a diy container home, land prep plays a bigger role than most expect—it sets the tone for everything that follows. A stable container home starts with a clean, level site. Clear all trees, stumps, and rocks, and grade the land to avoid drainage issues. For deep roots or compact soil, renting a mini excavator or using a simple penetrometer can help you prep the site properly. Keep slopes under 10°—anything steeper may need retaining walls.
Choose your foundation based on terrain and soil:
- Concrete slab – ideal for flat sites and single-container builds
- Pier footings – better for uneven land or multi-unit setups
- Helical piles – great for flood zones or fast installation on soft soil
Drainage must be done before containers arrive. To avoid costly rework later:
- Install French drains within 5 ft of the foundation
- Grade land at a 2% slope (2 inches per 10 feet)
- Use gutters and 4″ PVC pipes to divert water at least 15 feet from the home
Other common prep steps often missed:
- Call 811 before digging—utility marking is free and prevents accidents
- Keep at least 20 ft between containers and mature trees to avoid root damage
- Store tools in a dry place—a temporary conex box works well on-site
A well-prepped site keeps your timeline on track—and prevents headaches that cost far more to fix later.
Step 5: Placing the Container – It’s All About Precision
Getting your container on site is one thing—placing it right is another. Poor alignment or ground prep can lead to long-term issues like shifting, water pooling, or doors that won’t close properly.
Always check your delivery path 48 hours in advance. For a 40ft container, you’ll need at least 3.5m road width and 12m vertical clearance. Watch for overhanging trees or power lines—more than one project has stalled over a missed cable. Use a soil probe to test the delivery route—it must support 16 tons. If the soil compresses more than 2cm, add gravel to stabilize.
Choosing the right equipment makes placement safer and faster:
| Tool | Capacity | Cost |
| Mobile crane | Up to 40ft units | $450–$800/day |
| Telehandler | 20ft containers | $220–$400/day |
| Hydraulic jacks | Minor adjustments | $90/day |
For tight spaces, a 360° rotating crane may cost more—but it can save hours on repositioning.
When setting the container:
- Lift from certified corner castings only—straps can deform the walls.
- Use 10mm steel shims to level any gaps larger than 3mm.
- Face doors away from prevailing wind, especially in storm-prone areas.
Avoid common missteps: always check that anchor bolts are in place (M20 grade works best), reschedule if winds exceed 25 km/h, and confirm your crane provider’s insurance includes on-site coverage—surprisingly, many don’t.
Step 6: Cutting Openings – Where It Gets Technical
Cutting into a container isn’t just about making space—it affects structural integrity. Using the right tools and reinforcing properly makes all the difference.
Here’s a quick guide to common cutting tools:
| Tool | Best For | Cost/Hour |
| Plasma cutter | Clean window/door cuts | $85–$120 |
| Angle grinder | Small openings (vents) | $25–$40 |
| Oxy-fuel torch | Thick steel/floors | $70–$100 |
Avoid abrasive saws—they scatter sparks up to 6m, and we’ve seen them cause real damage.
Once cut, reinforce all openings. For a 2m x 2m cut, use 50mm x 50mm square tubing (3mm thick), and MIG weld at 18–22 volts. If removing over 30% of a wall, add 45° gusset plates for stability.
Don’t skip safety:
- Brace walls every 2.5m before cutting
- Use fume extractors—zinc fumes are toxic at high heat
- Keep a Class D extinguisher within reach
- Never cut on windy days, and always test your bracing before starting
For structural walls, hire a certified welder. One bad cut can cost more than doing it right the first time.
Step 7: Installing Doors, Windows, and Frames – Make It Watertight
Windows and doors do more than complete the look—they keep your home sealed, secure, and efficient. Poor framing or insulation here leads to leaks, heat loss, and expensive fixes.
Choose a proper mounting method based on your location:
| Method | Strength | Cost/ft | Best Use |
| Continuous weld | 500 MPa | $12–$18 | High-wind zones |
| Bolt-on frames | 320 MPa | $6–$10 | Temporary installations |
| Hybrid (weld+bolt) | 450 MPa | $9–$14 | Seismic areas |
Keep bolt spacing under 30cm—too wide and you risk inspection failure, as seen in a Nevada case that cost $1,200 to fix.
For thermal performance, use double-sealed, argon-filled windows with strong frames like fiberglass. Skipping insulation around frames causes major heat loss—we’ve seen cabins lose over 30% just through window edges.
To prevent bridging, wrap frames with EPDM rubber, use closed-cell spray foam for gaps, and install thermal breaks between metal surfaces. Seal properly with long-lasting products like 3M™ 5200, slope your sills, and water-test every opening after install. It’s small work now that avoids big problems later.
Step 8: Surface Treatment and Insulation – Protect and Preserve
Treating your container’s surface properly is what keeps rust, leaks, and energy loss at bay. Don’t rush this step—what you skip now will cost more later.
For used containers, remove rust and old paint first. Sandblasting to ISO Sa2.5 gives the most durable result, while angle grinders or chemical strippers work for smaller areas.
| Method | Speed | Cost/sq.m | Best For |
| Sandblasting | 10m²/hour | $15–$25 | Heavy rust (ISO Sa2.5) |
| Angle grinder | 4m²/hour | $8–$12 | Small patches |
| Chemical stripper | 2m²/hour | $6–$9 | Sensitive surfaces |
After prepping, apply a zinc-rich epoxy primer (two coats, 75–100μm) followed by a polyurethane topcoat rated for long-term UV protection. Never use latex—it’s not designed for steel and fails in extreme temps.
When insulating, match material to your budget and climate. Spray foam fills tight spaces and resists moisture, while rigid foam and SIPs offer high R-values with varying install times.
| Type | R-Value/inch | Cost/sq.m | Install Time |
| Spray foam (closed) | 6.5 | $40–$70 | 2–3 days |
| Rigid XPS foam | 5 | $25–$45 | 4–6 days |
| SIPs panels | 7.2 | $55–$90 | 1–2 days |
In hot zones, reflective coatings can reduce interior temps by up to 14°C, while aluminum cladding adds long-term durability. Just avoid cheap DIY films—they rarely hold up in strong wind.
Always test wall moisture before insulating, seal all gaps, and ventilate after spray foam. A well-sealed, insulated container performs better year-round and avoids expensive rework.
Step 9: Electrical and Plumbing – Plan It Before You Seal It
Before insulation goes in, every pipe and wire needs to be installed and tested. Changing layouts afterward means tearing through walls—avoid the rework.
Start with plumbing. PEX is flexible and affordable but can burst in extreme cold. Copper suits high-pressure systems but needs protection below freezing. PVC works well for drainage but cracks in low temps. To minimize issues, keep hot water lines 15cm from insulation, support pipes every 10cm, and pressure-test at 1.5× operating PSI before moving on.
| Pipe Type | Cost/ft | Best Use | Freeze Risk |
| PEX | $0.80–$1.50 | -30°C to 90°C climates | Bursts at -40°C |
| Copper | $2.20–$4.00 | High-pressure systems | Vulnerable below -10°C |
| PVC | $0.30–$0.80 | Drainage only | Cracks at -15°C |
Once plumbing’s in, plan your electrical. Use PVC conduit for easy routing, or metal for better fire resistance. Stick to 14 AWG for 15A circuits and 10 AWG for 30A appliances. Don’t underestimate placement—spray foam expands, so leave 2cm around boxes, and avoid placing outlets too close to water. Code requires GFCIs near sinks and proper clearance between systems.
Always separate water and wires by at least 30cm, label all circuits clearly, and pull permits early to avoid delays. Most importantly, leave access panels for shutoffs and junctions—they’re a lifesaver when repairs come up.
Step 10: Final Inspection and Move-In – Don’t Skip the Last Step
Your build might look complete, but it’s not move-in ready until everything is tested and passed. This last round of checks ensures your home is safe, sealed, and built to last.
Start with a full system inspection. Licensed pros should test:
| System | Test Method | Pass Standard | Common Failure |
| Electrical | 500V megger test | ≥1MΩ resistance | Ground faults in outlets/circuits |
| Plumbing | 24h pressure at 80 PSI | <0.5% pressure drop | Leaks at joints or weak fittings |
| HVAC | Duct blaster test | ≤5% airflow loss | Unsealed ducts waste energy |
| Air Quality | VOC sensor test | <0.08ppm formaldehyde | Off-gassing from low-grade materials |
Check seals with smoke pens and water spray—small gaps let in drafts and moisture fast. Use butyl tape for joints, especially in cold zones, and replace rubber gaskets every few years.
After move-in, regular checks are key. Monitor rust-prone areas, reseal joints as needed, and test outlets annually. Moisture meters, VOC sensors, and infrared scans can spot problems early—before they cost thousands to fix.
Your first year is a learning curve. Keep track of small issues and budget 1–2% annually for upkeep. A little attention now keeps your container home durable, efficient, and stress-free in the long run.
Build Your Container House Right from Foundation to Finish
Creating a container house isn’t just about reusing steel boxes—it’s about transforming them into lasting, livable homes with the right approach. Most problems we’ve seen come from cutting corners or underestimating what a steel structure really needs—from foundation to final inspection.
As a prefabricated steel structure manufacturer, we help make the process smoother. Our container house systems come with engineered framing, pre-cut openings, custom insulation layers, and structural reinforcements that are tailored to local codes and climates. This means fewer delays, fewer surprises, and a safer, more efficient build.
Whether you’re planning your first container house or scaling up a larger project, we’re here to support your vision—with solutions that are strong, smart, and built to last.
Faq About Building Shipping Container Home
How Much Does It Cost To Build A Shipping Container Home?
Costs vary widely, but most builds range from $150 to $300 per square foot depending on insulation, foundation type, and local permit fees. Always budget 10–15% extra for surprises like crane rental or code-related changes.
How Long Does It Take To Finish A Container House?
With proper planning and permits in place, how long does it take to build a container home is often just 3–6 months—much faster than traditional builds. Delays often come from zoning approvals or weather—not the containers themselves.
Can You Build A Container House In Cold Or Hot Climates?
Yes, but you’ll need to insulate well and choose the right materials. Spray foam works best in extreme cold, while reflective coatings and proper ventilation help in hot zones.
How To Build A 2 Story Container Home?
Start with a solid foundation that can support stacked weight—concrete slabs or reinforced piers work best. Use ISO-certified containers and make sure the bottom level is perfectly level before placing the second. You’ll need a crane to stack them safely and weld or bolt the corner castings together for stability. Reinforce openings like doors or stairwells between floors with steel framing so the structure doesn’t shift. And don’t forget—you’ll need separate permits and inspections for multi-story builds, especially for stair access and emergency exits.