If you’re thinking about using a shipping container for storage, living space, or any kind of outdoor setup, there’s one thing you’ll want to get straight before it goes up against the weather.
Shipping containers are water-resistant, but that doesn’t mean they’re waterproof. The two might sound almost the same—but in real-life conditions, especially in rainy or coastal areas, that little difference can make a big impact. Trust us, it’s something you don’t want to find out the hard way.
This guide breaks down what those terms really mean, why most containers aren’t airtight either, and what you can actually do to keep water out and protect your setup—based on what we’ve seen work in real container builds.
Why Aren’t Shipping Containers Fully Waterproof or Airtight?
Shipping containers are built tough, no doubt about it—but that doesn’t mean they’re sealed tight against every drop of water or puff of air.
So what’s the deal? Before diving into the reasons, let’s clear up a few terms that often get mixed up—they may sound similar, but they’re not saying the same thing.
- Water-resistant: means a container can handle rain, splashes, and general moisture without taking on damage right away.
- Waterproof: means no water gets in—period. That’s a whole different level.
- Watertight: is a term you’ll hear a lot, but it only really applies when everything’s in top shape. And let’s be real—containers rarely stay flawless after years of use.
So, why don’t most containers meet that waterproof or airtight standard? It usually comes down to age, wear and tear, or the conditions they’re exposed to. Let’s break down what really affects their resistance.
For a closer look at potential risks, you might want to explore what not to store in shipping containers—this can help you avoid keeping items that might exacerbate moisture issues.
Rubber Seals Don’t Last Forever
The rubber seals around container doors are meant to keep out water and air. When new, they do a great job blocking out rain and sea spray.
But over time, sunlight, heat, and weather exposure take their toll. The rubber hardens, cracks, or pulls away from the door frame, creating tiny gaps. And it doesn’t take much—just a small tear in the seal can let in water during a storm. If a container’s been sitting unused for years, this is often one of the first weak spots we see.
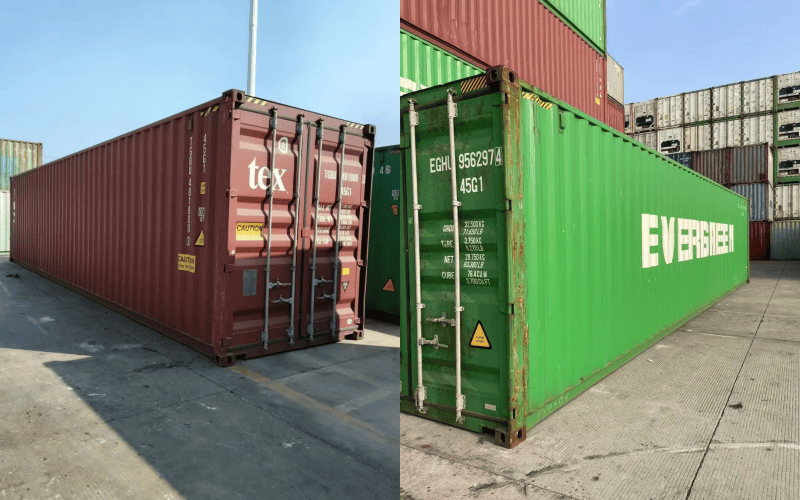
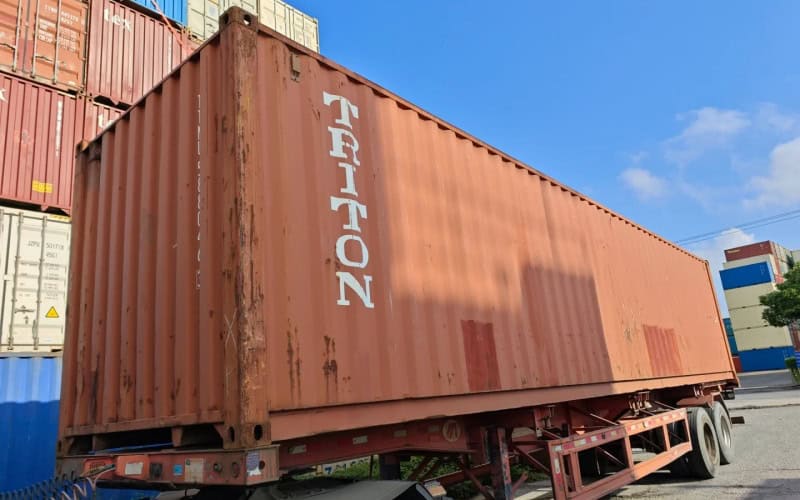
Used Containers Come with Wear and Tear
Second-hand containers often have years of use behind them. Scratches, worn-out paint, and small dents may not seem like a big deal—but they open the door to corrosion and water seepage.
Even pinholes from rust can let moisture in, especially if you’re storing items that can’t get wet. That’s why it’s so important to inspect the surface carefully, especially around corners, door edges, and the roof.
Physical Damage During Transport
Containers are built for transport—but that doesn’t mean they’re immune to damage. Drops, stacking stress, or bumps from forklifts and cranes can create hairline cracks or loosen seams.
And if a container’s been through rough shipping routes with constant movement or heavy wave impact, the structural strain can weaken its water resistance. You might not see the damage at first glance, but a leak can start small and grow over time.
Rust and Corrosion in Harsh Environments
In wet or coastal regions, rust shows up faster than you think. Salt air, heavy rains, or even sitting directly on wet ground for too long can speed up corrosion.
Once rust starts to eat through the steel—especially around the base, joints, or roof seams—water resistance drops fast. And in humid climates, even the inside of the container can start developing hidden rust patches that go unnoticed until a real leak happens.
How to Improve Shipping Container Water Resistance
Shipping containers can’t stay water-resistant forever without a little help—especially if they’re used long-term or in challenging environments. The good news is, with the right upgrades and care, you can seriously boost their ability to keep moisture out.
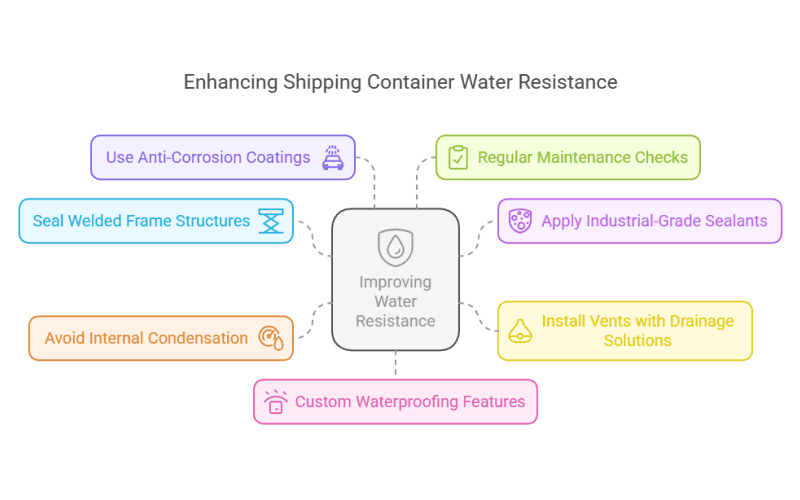
Seal Welded Frame Structures
One of the first things we look at in any container build is the frame. Gaps in the corners or along seams—especially if not fully welded—can let water creep in over time.
A solid, continuous weld along the structural joints helps prevent leaks where panels meet. This is especially important for modified containers that have had windows, doors, or extra framing added. Even a small opening in the frame can turn into a serious leak point during a heavy rain.
Quick checklist for weld inspection:
☐ Are all corner joints fully sealed?
☐ Any visible gaps or cracks in the welds?
☐ Has any modification (like windows) weakened the original frame?
☐ Are all roof-to-wall seams properly joined?
☐ Any signs of rust forming along weld lines?
☐ Has the container been checked after transport or handling stress?
It’s a small part of the structure—but when it fails, it tends to let in big problems.
Apply Industrial-Grade Caulking and Sealants
Not all caulking is created equal. For exterior seams, especially around windows, doors, and floor corners, it’s important to use marine-grade or industrial sealants.
These products are designed to stay flexible and durable in harsh outdoor conditions. Over time, cheaper sealants dry out and crack, which defeats the whole purpose. We’ve seen this happen a lot when people try to cut corners with home-grade products. Trust us—it’s not worth the risk.
Recommended Application Areas:
| Area | Sealant Type |
| Window frames | Marine-grade polyurethane |
| Floor edges | Industrial silicone sealant |
| Roof seams | Bitumen or EPDM-based coatings |
| Door gaskets & hinges | Flexible rubberized sealant |
| Corner joints | Polyurethane construction adhesive |
| Vent surrounds | UV-resistant acrylic sealant |
| Welded seam overlaps | Self-leveling polyurethane compound |
How much is enough?
Each seam or edge should have a continuous bead of sealant with at least 5mm of depth, completely filling any gap and slightly overlapping both sides of the joint. For larger seams—like roof edges or modified window frames—a second pass or thicker layer (up to 10mm) may be needed. Don’t just brush over the surface; make sure the sealant is pressed in and bonded to both sides.
If you can still see the edge of the gap—or light through a seam—it’s not sealed enough.
Install Vents with Drainage Solutions
Adding ventilation is a smart move—but not all vents are created equal. Some just let in air, but others are designed with built-in drainage paths.
These special vents allow a bit of rainwater that enters to drain back outside, rather than collect inside the container. They also help prevent that stale, damp feeling and reduce the risk of mold or mildew building up inside.
Drainage-capable vent features to look for:
- Sloped lower edge – Helps direct water toward the drain path rather than letting it sit.
- Internal drip channel – Catches any incoming moisture and channels it outward.
- External rain cover or hood – Shields the vent opening from direct rainfall or splashing.
- Backdraft damper – Prevents wind-driven rain or reverse airflow from pushing moisture inside.
- Mesh insect screen – Keeps bugs out without blocking drainage or airflow.
- UV-resistant materials – Prevents cracking or warping over time, which could affect the drain path.
- Mounting flange with gasket – Ensures a tight seal against the container wall, preventing leaks around the vent base.
When choosing vents, always think beyond just airflow—water handling is just as important.
Avoid Internal Condensation
Condensation might not seem like a big deal at first—until you notice damp walls, rust spots, or even puddles forming inside the container.
The key is to prevent moisture buildup from the start. This means good airflow, using moisture-resistant materials inside the build, and keeping contents from sitting directly against the metal walls. Adding insulation to the interior is also a smart move, as it helps regulate temperature swings and reduces the chances of condensation forming in the first place.
Even small details like lifting boxes off the floor can make a big difference. And in particularly humid environments, placing moisture absorbers like silica gel or calcium chloride inside the container can help control hidden moisture before it becomes a problem.
Use Anti-Corrosion Coatings
To help the exterior hold up against the elements—especially in humid or salty climates—it’s worth investing in anti-rust coatings.
These include zinc-rich primers, epoxy layers, or even galvanizing. Areas most prone to corrosion, like the roof, base corners, and lower wall panels, benefit most from extra layers of protection.
Comparison of common coatings:
| Coating Type | Best Use | Durability |
| Zinc Primer | General rust prevention | Moderate |
| Epoxy Coating | High-humidity environments | High |
| Galvanized Finish | Long-term exterior use | Very High |
| Polyurethane Topcoat | UV protection and flexible finishes | High |
| Bitumen Coating | Underbody and floor panel protection | Moderate |
| Powder Coating | Smooth, durable exterior finish | High |
| Cold Galvanizing Compound | On-site repair of galvanized surfaces | Moderate–High |
Regular Maintenance Checks
Even with the best setup, containers still need periodic attention. Small issues become big problems if ignored, and many leaks can be prevented just by catching them early.
We suggest regular walkarounds to check door seals, look for rust patches, inspect drainage systems, and make sure vents aren’t blocked. A few minutes of inspection every few months can save you a lot of stress down the road.
Maintenance schedule tips:
- Monthly: Quick visual check for rust or dents
- Quarterly: Test all door seals and drainage
- Yearly: Reapply protective coatings if needed
As you consider your maintenance schedule, be sure to also review how to insulate a shipping container, especially in areas prone to condensation. Proper insulation can reduce moisture buildup, making your container even more effective in harsh environments.
Add Custom Waterproofing Features Based on Use
Different uses call for different levels of protection. A container used as a dry storage unit in the desert doesn’t need the same setup as one being turned into a seaside coffee shop.
From experience, we often suggest custom waterproofing upgrades based on how and where the container will be used—like adding floor-level barriers, extra roof sealing, or reinforced door frames. Tailoring these details makes a big difference in long-term performance.
Use-specific waterproofing ideas:
- Residential use: Full roof membrane, vapor barrier insulation
- Storage use: Desiccant packs, raised shelving, rear venting
- Retail/commercial: Weatherproof entry doors, insulated service windows
So, Are Shipping Containers Water Resistant?
Yes—they are. But water-resistant doesn’t mean waterproof, and that difference matters more than most people realize.
Throughout this guide, we’ve covered what makes a shipping container water-resistant, why most aren’t truly airtight or waterproof, and the practical steps you can take to improve performance. From checking welds and applying sealants, to adding insulation and managing ventilation—every detail counts when it comes to keeping moisture out.
Experience Makes the Difference
With decades of experience in the container building industry, we’ve developed specialized waterproofing solutions tailored to real-world use. From custom structural framing to reinforced seals and anti-condensation systems, we know how to make container spaces stay dry—and stay that way.
Unlike standard containers built for transport, our prefabricated steel container buildings are engineered for long-term performance in all kinds of environments. For the roof, we apply a three-step waterproofing process: first adding waterproof cotton, then sealing with industrial-grade adhesive, and finally applying a protective asphalt layer—ensuring maximum moisture resistance from top to bottom.
Looking for a weather-ready, steel-strong container building?
That’s especially true if you’re turning a container into a long-term structure, like a shipping container ADU, shipping container tiny house, or shipping container restaurant. We build them smarter, drier, and more durable—ready to meet your goals, no matter the climate or application.