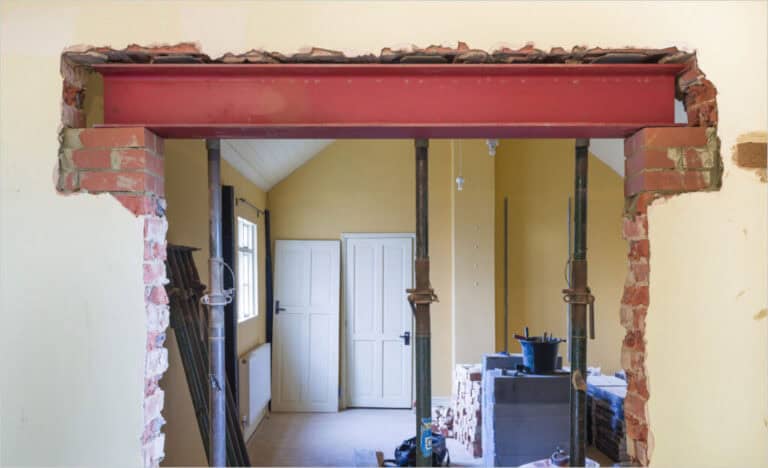
Constructing a metal storage facility is a significant financial commitment, and proper setup is crucial for its sustained performance. Each step must ensure structural integrity, safety, and efficiency from groundwork to roofing.
This guide covers the essential installation steps, focusing on what matters most. Whether you’re handling the installation yourself or with your team, understanding these procedures will streamline the process.
Our steel warehouses include detailed manuals and installation guides. If you encounter any difficulties during setup, don’t hesitate to reach out to our specialists for support.
How to Install a Steel Warehouse?
Building a steel warehouse requires careful planning and precision. By following each step properly—from site preparation to frame assembly—you ensure stability and long-term durability.
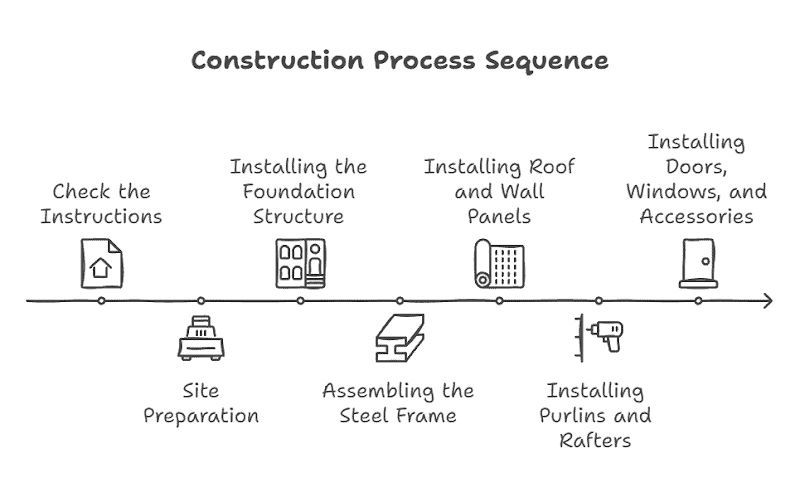
1. Check the Instructions
Always review the manuals and instructions before starting. We provide detailed guides and remote support to clarify any uncertainties. These include tool lists, bolt specifications, and safety precautions.
- Tools & Equipment: Typical tools include cranes (5-ton capacity), torque wrenches (200-500Nm), and scaffolding.
2. Site Preparation
A solid, level foundation is key to ensuring the stability of the structure.
- Ground Leveling: Use crushed stone or gravel (50mm-150mm thick) to ensure proper drainage.
- Soil Stabilization: For low-bearing soil (<100kN/m²), use cement or geotextile fabrics to improve strength. Commonly, 5-10% cement is mixed into the soil for stabilization.
- Quality Control: Use a laser level to ensure the ground is level within ±5mm/m². Check for debris and proper soil stabilization.
3. Installing the Foundation Structure
Verify anchor bolt positions before pouring concrete. These bolts hold the frame to the foundation.
- Mark Bolt Positions: Use the foundation layout plan to mark exact positions for anchor bolts, ensuring accuracy according to structural drawings.
- Drill Holes: Drill holes to the specified size and depth (typically 100mm to 200mm) for the bolts.
- Clean Holes: Use a brush or compressed air to eliminate any debris, ensuring a strong bond with the concrete.
- Place Anchor Bolts: Insert the bolts into the holes, making sure they are vertical by using a spirit level.
- Check Alignment: Verify bolt alignment with a laser level or measuring tape, ensuring they are within ±2mm of the correct position.
- Pour Concrete: Pour and settle the concrete around the bolts to secure them in position.
- Cure Concrete: Allow concrete to cure for 7 days to gain adequate strength before proceeding.
Quality Control:
- Ensure the anchor bolts are aligned, vertical, and clean.
- Double-check that the bolt holes are free of debris and correctly sized.
- Verify that the concrete is evenly poured and the anchor bolts remain securely in place during curing.
4. Assembling the Steel Frame
Our pre-fabricated frame arrives with all parts measured and pre-cut.
1. Installing Steel Columns
- Position Columns: Use a crane to lift the steel columns into position, ensuring they are aligned with the foundation anchor bolts.
- Align Columns: Utilize a spirit level or laser level to verify that the columns are exactly upright.
- Secure Columns: Insert bolts through the holes in the column base and foundation anchor bolts. Secure the bolts using a torque wrench, applying the specified torque, which usually ranges from 200-500Nm. Use spacers to maintain correct spacing between columns.
- Double-Check Alignment: Verify the column positions with a measuring tape, ensuring that spacing between columns matches the design drawings. The gap between columns should typically be within ±5mm of the design specification.
2. Installing Steel Beams
- Position Beams: Using a crane, carefully position the steel beams on top of the installed columns.
- Align Beams: Check the alignment of the beams using a laser or spirit level. Beams should be level, and their positions should match the design, with a typical tolerance of ±0.5mm.
- Bolt Beams: Insert bolts through the beam and column connections, ensuring that the holes are aligned.Fasten the bolts with a torque wrench, following the specified torque range (usually 200-500Nm).
- Verify Alignment: After bolting, recheck the alignment of each beam. Make sure they are horizontal and at the correct angle to the columns.
3. Quality Control
- Check Column Verticality: After installation, recheck the vertical alignment of the columns. Use a plumb line or laser level to check that the columns are precisely upright.
- Check Beam Alignment: Verify the beam alignment both horizontally and vertically. Ensure the beams are level and parallel with the columns.
- Check Bolt Tightness: Use a torque wrench to confirm that all bolts are tightened to the required torque.
5. Installing Roof and Wall Panels
After the frame is assembled, proceed with installing the roof and wall panels.
1. Prepare and Position Panels
- Roof Panels: Start from one end and align the panels with the purlins. Overlap panels by 100mm for waterproofing.
- Wall Panels: Position vertically against the frame, aligning with vertical studs or columns.
2. Secure Panels
- Roof: Use screws or bolts at 150mm-200mm intervals to secure panels. Ensure each panel is tightly fastened, especially at overlaps. Apply sealant at the edges to prevent leaks.
- Wall: Secure wall panels using screws or bolts spaced 300mm-400mm apart. Ensure no gaps between adjacent panels.
3. Quality Control
- Check that roof panels overlap by 100mm and align with purlins.
- Ensure all fasteners are tight and properly placed.
- Inspect for any misalignments or gaps in the panels, adjusting as necessary.
6. Installing Purlins and Rafters
Install purlins (spanning horizontal members) and rafters to support the roofing system.
1. Position and Secure Purlins
- Mark the positions on rafters and lift the purlins into place. Ensure they are aligned and spaced 1.2m apart (or as per design).
- Bolt purlins to rafters using galvanized steel bolts (M12/M16), tightening them to the specified torque (50-70Nm).
2. Install and Secure Rafters
- Lift rafters into place on the main beams and bolt them securely. Ensure they are level and plumb.
3. Quality Control
- Verify purlins are level and spaced correctly, and that rafters are aligned. Ensure all bolts are tight and secure.
7. Installing Doors, Windows, and Accessories
1. Verify Dimensions and Position: Confirm door/window sizes and positions match the design. Use a laser level to ensure the frame openings are square and aligned.
2. Install Frames: Lift the frames into position, checking they are level and plumb. Secure them with bolts or welding, ensuring the frames are square.
3. Install Sashes: Mount the doors/windows onto the frames, ensuring smooth operation. Adjust hinges or tracks as needed.
4. Install Accessories: Fix locks, handles, and seals, ensuring that all parts are securely fitted and operate correctly. Check for proper sealing to prevent leaks.
5. Quality Control: Ensure proper alignment and smooth operation. Confirm all accessories are securely fastened and seals are tight to prevent leaks.
8. Final Inspection
Before finalizing the installation, perform a detailed inspection. Ensure all bolts are tightly secured, there are no gaps in the roof or walls, and that the structure is level and square to within 5mm/m. Any deviations from the alignment should be corrected before finalizing.
To help visualize the entire process, watch our 3D animation that clearly demonstrates each installation step.
Get a Quote From a Manufacturer of Integrated Steel Structure Warehouses
Our steel warehouses are designed to meet the demands of both extreme cold climates and regions with year-round rainfall, with special reinforcements to the roofing and wall systems to ensure durability and performance. You can rest assured that installation will be smooth, as we provide detailed blueprints, instructional videos, and full support throughout the entire assembly process. Regardless of the challenges you encounter, our team is here to assist you every step of the way.
Frequently Asked Questions
Are There Any Warranty or Support Services Available During Installation?
Yes, we offer a warranty for all steel warehouse components and provide remote support for installation to assist with any challenges.
What Happens If the Purlins or Rafters Are Misaligned During Installation?
Misalignment can affect the roof structure’s integrity, so correcting any issues immediately is crucial by adjusting the purlins or rafters to the proper position.
Can I Get a Customized Design or Features for My Steel Warehouse?
Absolutely, we provide customized design solutions to fit your exact requirements, including adjustments to size, mezzanine and layout, as well as added features like insulation or ventilation.
Related Reading: steel structure warehouse mezzanine
What Are the Methods of Construction for Steel Buildings?
Steel buildings are typically constructed using prefabricated components, bolted or welded on-site, with a focus on speed and durability.
How Hard Is It to Put Up a Steel Building?
Building a steel structure is relatively straightforward, especially with prefabricated parts, but requires precision and attention to detail during installation for structural integrity.