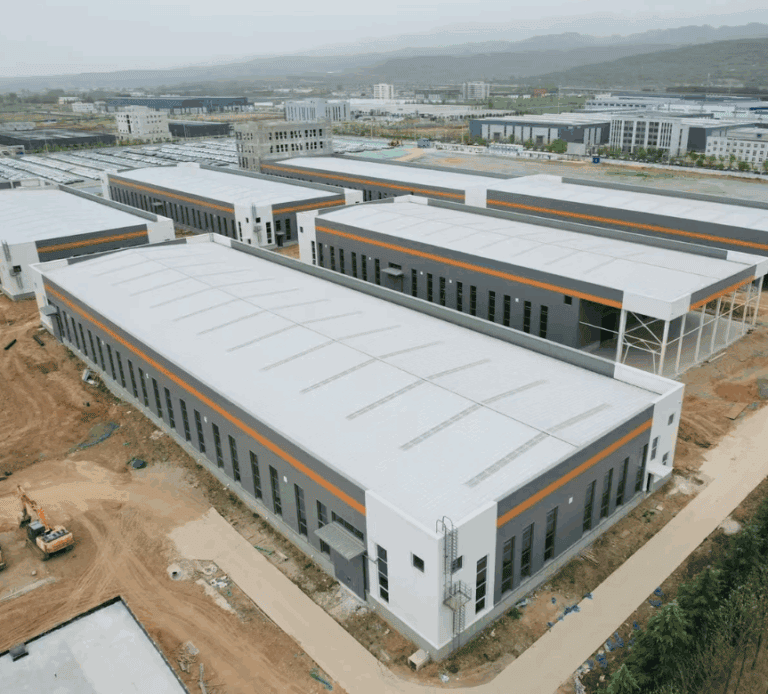
C Purlins are key structural components in steel and PEB buildings, used to support roof and wall systems. Many builders ask how to join and install C Purlins safely and efficiently. This guide gives a clear, actionable answer — explaining installation preparation, alignment, connection details, span performance, and factory-direct supply options from SteelPRO PEB, a certified steel structure manufacturer.
Before installation, we cover essential preparation checks for hole alignment, coating protection, and transport deformation. Then, a step-by-step installation guide explains orientation, spacing, and fastening for metal roofs, followed by detailed instructions on how to join and connect C Purlins using overlap, sleeve, and bracket methods. You’ll also learn common mistakes to avoid, ensuring strong and corrosion-free joints.
Finally, the article includes a C Purlin span and load capacity chart, price references for 100mm–300mm sizes, and information on factory-direct supply and manufacturer support. Whether you’re a contractor, designer, or project buyer, this complete factory guide helps you achieve precise installation and reliable connections backed by SteelPRO PEB expertise.
C Purlin Installation Preparation and Alignment Guide
Before installing C Purlins, proper preparation ensures precise alignment, coating protection, and long-term structural reliability. This section explains how to check hole alignment, verify coating compatibility, and inspect transport deformation before starting installation — three essential steps to avoid costly misalignment or corrosion problems.
1. Hole Alignment Tolerance
- Even a 2mm misalignment in pre-drilled holes can delay the project.
- If you use non-matching connectors, holes may not align and cause a full rework.
- Always use factory-punched C purlins for perfect fit.
- If sourcing parts separately, check hole spacing with a calibrated steel ruler before installation.
2. Coating Compatibility
- Mixing the wrong sealants or fasteners can damage the galvanized coating.
- In coastal or humid areas, corrosion happens in 6 months if coatings mismatch.
- Use neutral-cure sealants and zinc-friendly fasteners only.
- A coating thickness gauge ensures the purlins have enough protection.
3. Transport-Induced Deformation
- Cold-formed steel may bend slightly during transport.
- Small bends (up to 3°) usually recover during installation.
- Let purlins rest for 24 hours after unloading.
- If still bent, use controlled clamping—never force into place.
- Forcing bent purlins into place will cause rebound and later misalignment.
Use SteelPRO PEB factory-direct C purlins with pre-punched holes, certified coatings, and protected delivery to avoid all these risks.
Step-by-Step C Purlin Installation Guide for Metal Roofs
To install C Purlins for metal roofs safely and accurately, follow these practical steps: check your tools and materials, secure the purlins to frames, align orientation, and add bracing for stability. This step-by-step guide covers everything you need to complete installation correctly — from material inspection and fastening techniques to span orientation and safety practices that ensure a durable metal roof structure.
Material and Tools Check
Before installation, make sure all purlins and tools meet the requirements.
- Inspect purlins for bends, cracks, rust, or coating defects.
- Verify thickness with a caliper (e.g., 1.5mm or 2.0mm).
- Check hole alignment with the blueprint. A 1mm mismatch per joint can lead to 10cm misalignment over 10m span.
Tool Checklist:
| Tool | Purpose |
| Electric screwdriver | Secure screws and bolts |
| Torque wrench | Tighten to correct torque (28 Nm) |
| Laser level | Keep alignment precise |
| Scaffolding/Ladders | Ensure safe access |
Installation Steps
- Secure Purlins to Frames
- Use Tek screws for thin steel and bolts for heavy loads.
- Keep screws 20mm from the edge to prevent tearing.
- Place two fasteners per joint, spaced 50mm apart.
- Align Purlins Horizontally
- Install with opening facing up for cladding and drainage.
- After every 3 purlins, check alignment with a spirit level.
- If misaligned, loosen screws, adjust with a rubber mallet, and retighten.
- Add Bracing for Stability
- Install steel straps every 4–6m as temporary bracing.
- Never stack roof panels on unbraced purlins—this causes warping.
Span and Orientation
Proper orientation and spacing prevent structural failure.
C Purlin Span Chart:
| Purlin Size | Max Span (m) | Recommended Use |
| 100mm | 4.0–4.5 | Light roofs, small sheds |
| 150mm | 5.5–6.0 | Standard warehouse roofs |
| 200mm | 6.5–7.0 | Heavy-duty roof structures |
| 300mm | 8.0+ | Long-span or industrial use |
- Rule of thumb: 1.2m spacing for light roofs, 1.8m for heavy snow or load conditions.
- Always confirm with local building codes.
For certified factory-direct C purlins with precise punching and reliable span performance, contact SteelPRO PEB manufacturer for wholesale supply.
How to Join and Connect C Purlins: Best Methods and Bracket Details
To join or connect C Purlins securely, use overlap joints for high load strength, sleeves for aesthetic finishes, or brackets for high-stress points. This section breaks down each connection method — overlap, sleeve, butt, miter, and bracket joints — with detailed steps, torque guidance, and practical examples so you can choose the best joining approach for your structure.
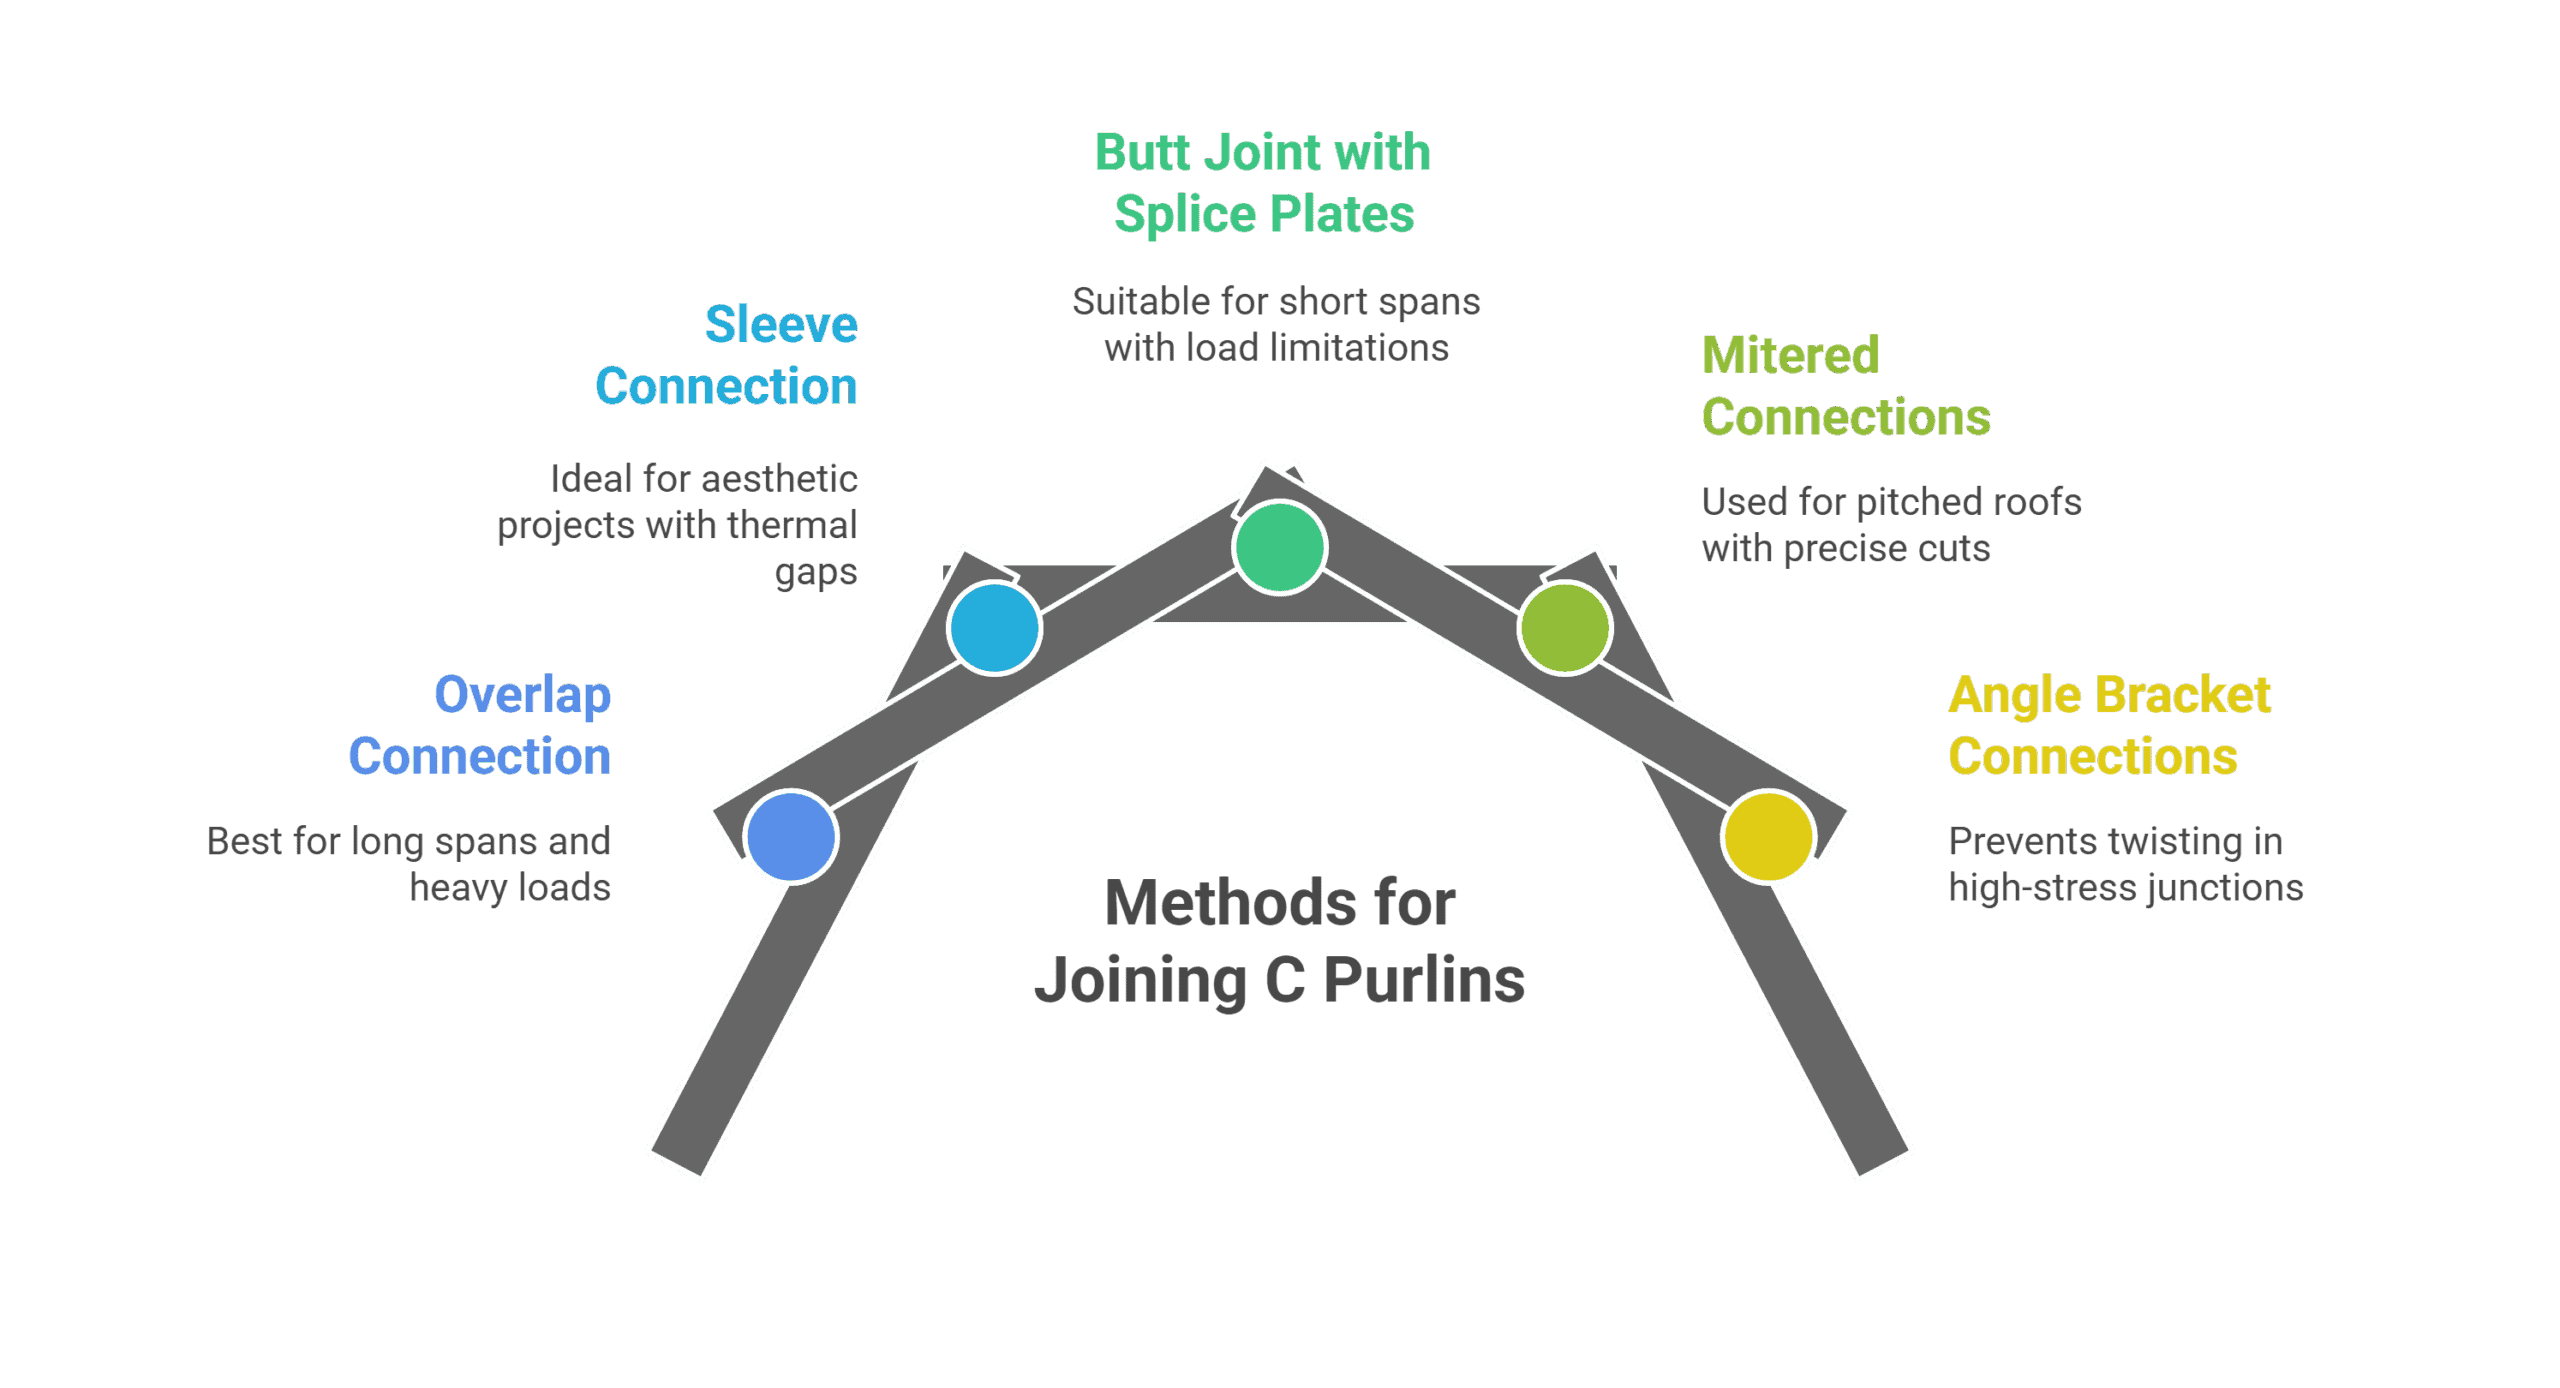
Overlap Connection
- Best for long spans and heavy loads.
- Extend overlap to 600mm for high snow or wind zones.
- Fix with staggered Tek screws (No. 12 gauge) at 75mm intervals.
- Torque: 15–20 Nm.
Example: A warehouse with 500mm overlaps and 8 screws per joint resisted 80kg/m² snow load without deflection.
Sleeve Connection
- Best for aesthetic projects (office, retail).
- Sleeve length: 600mm total (300mm per side).
- Leave a 2mm thermal gap between purlins.
- Fix with M12 bolts, 4 per side.
Advantage: Creates seamless joints while allowing thermal expansion.
Butt Joint with Splice Plates
- Best for short spans (<4m) where overlap is not possible.
- Use 6mm-thick splice plates, 150mm beyond each end.
- Drill holes 50mm from plate edges.
- Use M12 bolts with lock nuts.
Limitation: Carries 25% less load than overlap—avoid in heavy loads.
Mitered Connections for Sloped Roofs
- Best for pitched roofs (up to 30°).
- Use CNC factory-cut purlins to avoid misalignment.
- Bolt with 4 M12 bolts; shim gaps >1mm with galvanized strips.
Angle Bracket Connections
- Best for high-stress junctions (e.g., beams supporting HVAC).
- Use L-shaped 5mm steel brackets, every 1.2m.
- Torque: 35 Nm (to beam), 25 Nm (to purlin).
Prevents twisting and long-term deflection.
| Method | Best Use | Strength | Limitation |
| Overlap | Long spans, heavy load | Very strong | Needs longer material |
| Sleeve | Aesthetic projects | Medium | Requires thermal gap |
| Butt Joint | Short spans <4m | Medium-low | 25% weaker than overlap |
| Mitered | Sloped roofs | Strong if CNC | Errors with manual cutting |
| Brackets | High-stress junctions | Reinforced | Extra material needed |
C Purlin Joining Brackets: When and How to Use Them
C purlin joining brackets are used when direct overlap or sleeve joints are not sufficient to handle concentrated loads or complex roof geometries. They provide a strong, adjustable connection that maintains alignment and load transfer between purlins and supporting beams.
Common Types of Joining Brackets:
- L-type bracket: Ideal for straight purlin-to-beam connections. Offers rigid support and is commonly used in warehouse and workshop roofs.
- Z-type bracket: Designed for offset or sloped purlin connections, allowing smoother load transition in pitched roofs.
- Adjustable bracket: Features slotted holes for alignment correction and is suitable for field adjustments where minor tolerances exist.
Installation Guidelines:
- Position the bracket at each purlin joint, ensuring full contact with both members.
- Use M10–M12 galvanized bolts for fastening.
- Apply torque of 25–35 Nm to secure the bolts—25 Nm for purlin fastening, 35 Nm when connecting to a main beam.
- Always check alignment with a laser level before tightening the final bolts.
Factory-made joining brackets from SteelPRO PEB ensure precise fit, efficient load transfer, and a corrosion-resistant finish that meets international standards (ISO & CE certified).
Less Common Connection Types
- Welded C Purlins: Permanent, high-strength connections requiring skilled execution. Best for heavy-duty loads, but not ideal in coastal areas without corrosion-resistant coatings.
- Bolted Connections for Flexibility: Modular and easy to disassemble, often used where structures require adjustments over time.
- Clamp Connections: A no-drill, quick-install solution for temporary structures like event tents.
- Interlocking Sleeve Connections: Provides hidden joints for architectural purlins, but is limited to axial loads only.
- Hybrid Approaches: Mixes different connection types for custom applications, such as using overlaps at mid-span and sleeves at the ends for a combination of strength and aesthetics.
What is the best way to join C purlins for long spans?
Overlap connections with 600mm extension and staggered screws provide the highest load capacity.
Can C purlins be welded instead of bolted?
Welding is possible but not recommended in coastal or humid areas because welds corrode faster. Bolted or sleeved joints are safer.
Choose factory-direct C purlins with pre-cut overlaps, sleeves, or splice kits from SteelPRO PEB to save time and ensure certified strength.
Common Mistakes When Installing or Joining C Purlins
Even experienced builders can make small mistakes that lead to major alignment or corrosion issues. This section highlights the most frequent installation and joining errors — including misaligned holes, wrong torque, missing expansion gaps, and improper bracket use — based on SteelPRO PEB’s experience from over 1,000 factory projects, and explains the correct solutions for each problem.
| Mistake | Problem | Solution |
| Misaligned purlins | Causes cladding fit issues and weak joints | Use adjustable clamps and laser level; factory-punched purlins prevent mismatch |
| Under- or over-torqued screws | Loose joints (too low) or coating damage (too high) | Tighten to 15–20 Nm using torque wrench; mark screws with paint for check |
| No thermal expansion gap | Purlins buckle or crack with temperature change | Leave 1.5–2mm expansion gap at sleeves; use expansion bolts in hot regions |
| Misaligned bolt holes | Increases tear-out risk under load | Drill holes 50mm from plate edge; use 6mm splice plates extending 150mm |
| No angle brackets in high-stress zones | Twisting or deflection under heavy loads (e.g. HVAC) | Install 5mm steel brackets every 1.2m; torque 35 Nm (beam), 25 Nm (purlin) |
| Manual miter cutting | Creates 2–3° misalignment in sloped roofs | Use CNC pre-cut purlins; shim >1mm gaps with galvanized strips |
| Welding in humid/coastal areas | Welded joints corrode faster | Use bolted or sleeved joints with corrosion-resistant coatings |
| Wrong connection type | Weak joint or load failure | Use overlap for strength, sleeve for looks, butt joints only for <4m spans |
Bonus Tips:
- Even a 3mm misalignment can cause serious issues over long spans.
- Skipping temporary bracing may cause collapse under strong wind.
- Factory-direct C purlins reduce these risks by ensuring correct punching, coating, and joint kits.
Avoid costly rework. Order certified SteelPRO PEB C purlins with factory-prepared holes, coatings, and connectors for faster, error-free installation.
C Purlin Sizes, Load Capacity & Span Chart with Factory Price Guide
Here’s a quick reference to C Purlin sizes, span capacity, and load performance across standard dimensions from 100mm to 300mm, along with wholesale pricing direct from the SteelPRO PEB factory. This section includes the C Purlin size chart, span and thickness recommendations, and a factory price guide to help you choose the right specification for your project’s load and budget.
C Purlin Sizes and Span Chart
Different sizes of c purlins carry different loads. Use the span chart below as a general guide:
| Purlin Size | Thickness Range | Max Span (m) | Typical Application |
| 100mm | 1.5–2.0mm | 4.0–4.5 | Light roofs, sheds, small canopies |
| 150mm | 1.8–2.5mm | 5.5–6.0 | Standard warehouse roofs |
| 200mm | 2.0–3.0mm | 6.5–7.0 | Medium to heavy-duty roofs |
| 300mm | 2.5–3.5mm | 8.0+ | Long-span or industrial projects |
Always confirm span with project-specific design loads and local building codes.
C Purlin Wholesale Price Reference
Prices vary by size, thickness, and coating. Below is a general FOB reference range (for bulk orders):
| Purlin Size | Approx. Price (USD/ton) | Notes |
| 100mm | $620–680 | Light duty, fast-moving stock |
| 150mm | $640–700 | Popular for warehouses |
| 200mm | $660–720 | Stronger for heavy roofs |
| 300mm | $680–750 | For industrial applications |
Bulk orders enjoy lower prices. Factory-direct supply ensures stable quality and certified coating (Z275 or higher).
Example: 200mm C Purlin Span Performance
A 200mm factory-punched C Purlin from SteelPRO PEB can safely span up to 7 meters when produced with a 2.0mm thickness and installed at 1.5-meter spacing under standard roof load conditions.
This configuration is ideal for medium to heavy-duty roofs such as warehouses, workshops, and distribution centers. All 200mm C Purlins supplied by SteelPRO PEB are ISO and CE certified, ensuring precise punching, consistent coating thickness, and structural reliability over long spans.
For optimized performance, consult SteelPRO PEB engineers to confirm span and load requirements according to your local building codes and environmental conditions.
Factory-Direct Supply & Manufacturer Support from SteelPRO PEB
Our Factory Advantages
Backed by 24 production lines and ISO-certified processes, SteelPRO PEB provides full design, fabrication, installation, and warranty services for C Purlins and complete PEB structures.
- Annual production capacity: 120,000 tons of steel components, exported to over 20 countries.
- Factory-direct wholesale supply: Lower cost, consistent quality
- Certified production: Laser-cutting with ±1mm tolerance, Z275+ galvanized coating
- Custom kits: Pre-drilled holes, labeled components, ready-to-install packages
- On-site support: Installation coaching and technical consultation
Proven Project Results
- 60m warehouse: Double-fastened end brackets, zero uplift after 3 typhoons
- Coastal resorts: Hybrid stainless purlins (AZ150), 5+ years corrosion-free
- Industrial factory: Angle-bracket reinforced joints, prevented long-term deflection
Why Partner With SteelPRO PEB
- Reliable PEB Structures Manufacturer & Producer
- End-to-end support: From load calculation to final assembly
- Bulk supply with international certification
- Lifetime technical consultation
Get Factory-Direct Support
Contact SteelPRO PEB, your certified steel structure manufacturer and supplier.
Get a custom quote, span calculation, or connection design drawing today at [peb@steelprogroup.com].