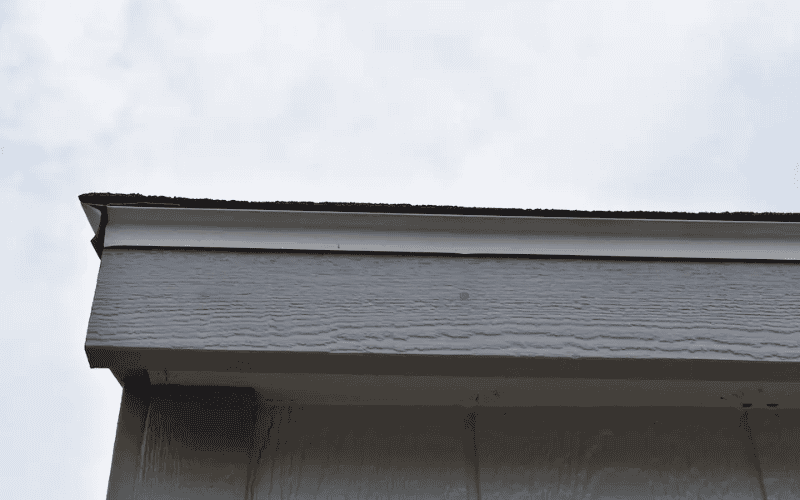
A metal roof drip edge is a small yet essential component that protects the roof’s edge from water damage and corrosion. Many homeowners and builders ask the same question — does every metal roof need a drip edge? The answer is almost always yes.
This guide explains everything you need to know: when and why a drip edge is necessary, which materials perform best under different climates, how to select the right type and edge detail, and how to install it step by step for both residential and industrial roofs. You’ll also find expert tips from professional installers to help you extend service life and prevent common issues such as leaks or rust.
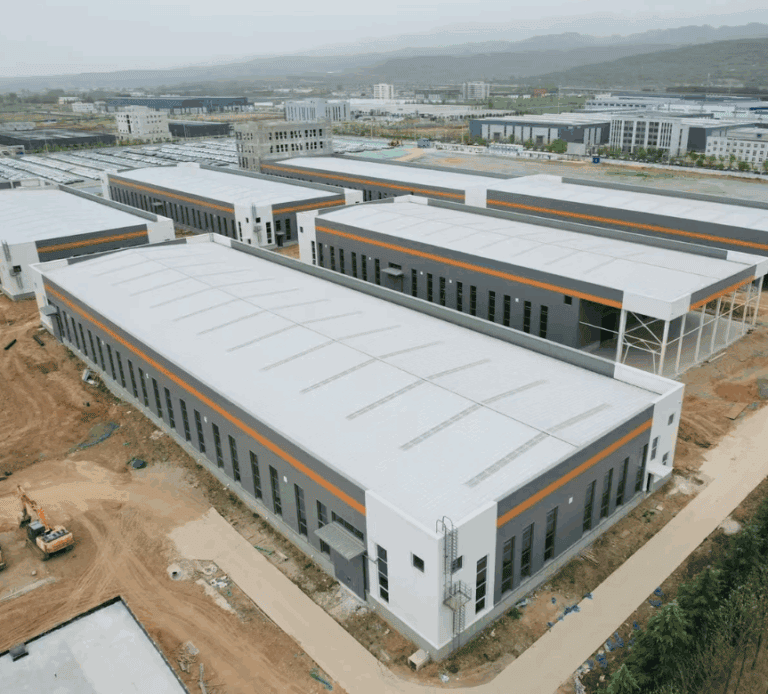
As a certified steel structures and PEB components manufacturer, SteelPRO Group provides factory-standard drip edge specifications used in industrial and commercial roofing systems worldwide—ensuring reliability, safety, and long-term protection.
What is a Metal Roof Drip Edge? (30-Second Explanation)
Imagine a heavy downpour where rainwater flows down your roof. Without a “water guide” at the edges, the water could splash everywhere, even flow back into the roof structure. That “water guide” is the drip edge, a metal strip installed along the roof’s edge to direct the rainwater away from the house.
The main functions of a drip edge are twofold:
- Prevent Water Backflow: It ensures rainwater doesn’t flow backward along the roof’s edge, protecting wooden structures from moisture damage and rot.
- Protect Roof Structure: It covers exposed edges, shielding the roof from wind, rain, snow, and other elements.
Although small in appearance, the drip edge plays a crucial role in protecting your roof. When installed correctly, it can significantly extend the lifespan of your roof, reduce maintenance costs, and improve the overall waterproofing of your home.
Does Your Metal Roof Need a Drip Edge?
When planning or maintaining a metal roof, one of the most common questions is: “Does my metal roof need a drip edge?” The short answer is — yes, in most cases, it’s essential.
A metal roof drip edge prevents water from flowing backward under the panels, protects the fascia and eaves, and keeps your structure free from water stains or rot. Without it, water infiltration can cause long-term damage to both the roofing material and the substructure.
When You Definitely Need a Drip Edge
If your building meets any of the following conditions, installing a drip edge is highly recommended:
- Rainy or Snowy Regions — Prevents water infiltration and ice dam formation.
- Exposed Wooden Eaves — Protects against rot and decay.
- Visible Damage at Roof Edge — Stops further corrosion or leakage.
- Local Building Codes Require It — Many regions include drip edges as mandatory in roofing codes.
When a Drip Edge Might Not Be Necessary
In rare cases, a drip edge may not be required:
- Fully Sealed Roof Designs — Where eaves are completely enclosed and waterproofing is already integrated.
- Advanced Drainage Systems — Certain modern buildings or canopies have integrated water channels that redirect rainwater efficiently.
For PEB or large steel building roofs, drip edges are almost always necessary due to the large surface drainage area and metal-to-metal joint exposure, which require precise water control.
If unsure, take a photo of your roof and consult a professional or manufacturer. They can assess your structure and confirm whether your roof needs a drip edge — this is especially important for industrial or steel-structure buildings.
Which Material is the Best for Your Metal Drip Edge?
When choosing a metal roof drip edge, materials such as galvanized steel, aluminum, or corrugated metal each offer unique performance advantages. The right choice depends on your building’s location, climate, and budget, as well as whether it’s a residential roof or an industrial steel structure.
| Material | Lifespan | Price Range | Pros | Cons | Best for |
| Aluminum | 25–40 years | $$ | Lightweight, corrosion-resistant, ideal for humid or coastal areas | Easier to dent, less suitable for heavy-duty roofs | Coastal and residential buildings |
| Galvanized Steel | 15–25 years | $ | High strength, economical, excellent for most climates | May rust after prolonged exposure without coating | Budget-friendly or inland projects |
| Copper | 50+ years | $$$ | Exceptional durability, aesthetic value, natural patina over time | Expensive and requires skilled installation | Premium or historic buildings |
| PVC-Coated Metal | 20–30 years | $$ | Available in various colors, good rust resistance | Coating may peel with age or exposure | Decorative or color-matched roofs |
| Corrugated Metal | 20–35 years | $$ | Durable structure, easy to align with corrugated roofing panels | Slightly heavier, needs careful sealing | Industrial and agricultural roofs |
Shopping and Application Tips
- Coastal or Humid Climates: Aluminum is preferred for its excellent corrosion resistance.
- Industrial or PEB Structures: Galvanized steel drip edges perform best for their strength, rust protection, and compatibility with factory-fabricated roof panels.
- Budget-Conscious Projects: Choose galvanized steel with an anti-rust coating for long-term value.
- Aesthetic Projects: Copper or PVC-coated edges add color and architectural appeal.
- Corrugated Roof Systems: Corrugated steel drip edges provide the most consistent alignment and water runoff performance.
For corrugated metal roof systems and PEB buildings, galvanized steel drip edges are generally the most cost-effective and durable option, offering reliable rust resistance and easy installation. Choosing the right drip edge material ultimately depends on your building’s environment, lifespan goals, and maintenance expectations.
How to Choose the Right Metal Roof Drip Edge?
Selecting the correct metal roof drip edge type and detail ensures proper water flow, long-term protection, and a consistent appearance between the roof and eaves. The right choice depends on your roof structure, slope, material, and the surrounding environment.
Common drip edge types include L-shaped, T-style, and custom edge angle designs, each serving different purposes for water deflection and edge protection. Understanding these differences helps you avoid future maintenance problems and ensures proper water drainage.
Set Your Budget
Start by defining your budget range. Aluminum and galvanized steel are more economical, while copper and PVC-coated edges fall into higher-end categories. Selecting within a clear price range helps narrow down materials and prevent overspending during installation.
Assess the Climate
Climate is one of the most important factors in choosing a drip edge.
- Coastal or humid areas: Aluminum or PVC-coated metals resist corrosion effectively.
- Rainy or snowy climates: Use wider or reinforced edges to handle higher runoff volume.
- Dry inland zones: Galvanized steel provides a durable, cost-efficient option.
Measure the Roof Slope
The slope affects both the width and type of drip edge. Steeper slopes generally require wider overhangs and deeper edges to ensure smooth water flow. For accurate results, use a slope measuring tool or consult a professional before purchasing.
Coordinate Colors and Finishes
Drip edges should visually align with your roof system. Choose a finish or coating that complements your panels and trim for a clean, cohesive look. Factory-coated galvanized or pre-painted drip edges often simplify installation while maintaining color consistency.
Check Accessory Compatibility
Ensure that the chosen drip edge matches the roof system’s accessories — screws, sealants, and panel joints should fit properly. Mismatched components may cause leaks or rusting along the edges.
For industrial and PEB buildings, always refer to factory-supplied drip edge specifications. These ensure accurate edge angles, material thickness, and fastening patterns consistent with the roof design.
Choosing the right drip edge type depends on understanding your building’s structure and environment. For best results, follow certified manufacturer guidelines and check standard drip edge detail diagrams to confirm edge angle and installation position.
6-Step DIY Installation Guide for Metal Roof Drip Edge
While DIY installation is suitable for small residential roofs, industrial or PEB structures require professional installation following standard fastening distances and factory specifications. The steps below outline a general process suitable for both home and light industrial applications.
Preparation Stage
Before beginning, ensure that all tools and safety gear are ready. Key items include a measuring tape, cutting tools, power drill, and protective gloves. Always work on a stable surface and have assistance when using ladders or lifting metal parts.
Installation Procedure (Residential & Industrial)
Step 1. Remove the Old Drip Edge
- For wooden eaves, carefully pry out the old edge without damaging the fascia.
- For metal eaves, unscrew the fasteners and gently remove the existing piece.
- If there is no previous drip edge, clean and smooth the edge area before installation.
Step 2. Take Accurate Measurements
- Measure the total roof edge length precisely to prevent material waste.
- Add an additional 5–10% allowance to account for cutting and overlap adjustments.
Step 3. Cut the Drip Edge Safely
- Use tin snips or an angle grinder to cut the drip edge pieces to size.
- Smooth all cut edges with a file to prevent sharp edges and ensure safe handling.
Step 4. Fasten the Drip Edge
- Align each piece along the roof edge and fasten it securely.
- Fasten the drip edge every 30–40 cm for aluminum or galvanized steel, and every 20–30 cm for copper, ensuring that screw heads sit flush with the surface.
- For industrial or large-span roofs, verify spacing according to factory or project standards.
Step 5. Seal All Joints Properly
Choose the sealing method based on material and exposure:
- Waterproof Tape: Quick to apply but suitable for short-term sealing.
- Silicone Sealant: Durable and flexible for most residential installations.
- Welding Seal: Ideal for copper or industrial drip edges requiring long-term performance.
Step 6. Perform a Final Check
- After completing installation, conduct a water flow test by spraying the roof edge.
- Ensure there are no leaks or blockages and confirm that all sections align evenly.
After installation, check alignment, joint sealing, and fastener spacing to ensure long-term stability and proper water drainage.
For PEB or industrial applications, follow factory-approved installation drawings and adhere to regional building standards for the best results.
5 Pro Tips from Experienced Installers
Even if you’ve followed the standard installation steps, the following professional tips can help extend the lifespan and performance of your drip edge system. These recommendations apply to both residential and metal building drip edge installations.
Golden Installation Time: Work Between 10–25°C
- Metal materials are easier to cut, align, and seal in moderate temperatures.
- Sealants such as silicone cure more effectively in this range.
- Install during spring or fall when possible to ensure proper adhesion and minimal material expansion.
Invisible Bird-Proof Design: Adjust the Edge Angle
- Bird nesting and debris accumulation can reduce drainage efficiency.
- Slightly bend the outer edge upward by about 10–15 degrees to discourage birds from perching while maintaining smooth water flow.
- Avoid excessive bending, as it may alter runoff direction.
Winter Care: Prevent Ice Dam Formation
- In cold climates, ice buildup at the roof’s edge can block drainage and cause leaks.
- Install heating cables beneath the drip edge or use wider gutter channels to allow melted water to escape.
- For industrial or PEB buildings, ensure electrical heating systems comply with regional safety codes.
Longevity Secret: Maintenance and Inspection Frequency
Regular maintenance ensures the drip edge performs effectively for years.
- Clean gutters and edges twice a year to remove debris and leaves.
- Inspect screws and replace any rusted fasteners with stainless steel ones.
- Reapply rust-proof coating or paint to exposed seams.
For metal building drip edges, perform a visual inspection every six months, especially after heavy rainfall or seasonal changes, to ensure joint stability and water flow integrity.
Emergency Repairs: Temporary Fix Options
If the drip edge becomes damaged or leaks unexpectedly, a temporary fix can prevent further issues:
- Use waterproof tape or silicone sealant to cover small cracks on clean, dry surfaces.
- For larger sections, fasten a metal patch (aluminum or galvanized) over the affected area and seal the edges.
- Temporary substitutes such as plastic sheets can be used briefly, but replace them with proper metal components as soon as possible.
By following these professional tips, you can maintain consistent water drainage and extend the service life of both residential and industrial roof systems.
Conclusion
A well-installed metal roof drip edge plays a crucial role in protecting the roof and maintaining its long-term performance. Though small in size, this component prevents water infiltration, shields structural edges, and significantly extends the service life of both residential and industrial roofs.
Proper selection and installation of the drip edge ensure smooth water flow, prevent rust and corrosion, and reduce maintenance costs over time. Whether for residential buildings, commercial facilities, or PEB steel structures, understanding the correct materials, types, and installation techniques is key to achieving lasting performance.
With the right planning and regular maintenance, your drip edge will not only protect your roof but also enhance its overall appearance and efficiency. Before installation, review standard drip edge detail diagrams or consult a qualified professional to ensure that your system functions reliably for years to come.