Yes, you can paint modular home walls, but the key to lasting, professional results lies in understanding your wall materials, surface preparation, and the right type of paint or coating. Modular walls often differ from traditional drywall, using factory-finished panels or steel-based structures that require specific coatings for adhesion and durability.
In this guide, you’ll learn what to check before painting, how to prepare and coat your modular walls properly, common mistakes to avoid, and how to maintain your painted surfaces for years of use. Each step is based on proven methods used in modular and prefabricated construction.
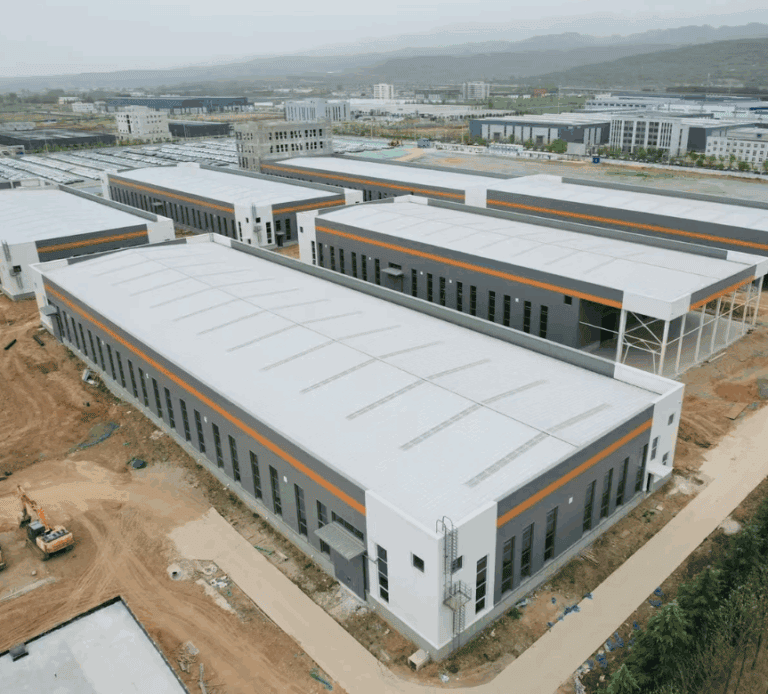
As a leading manufacturer of steel and modular structures, SteelPRO PEB combines hands-on experience with factory-applied coating technology to help you achieve finishes that last — whether in residential, educational, or commercial modular buildings.
Before You Start Painting Modular Home Walls
Unlike traditional homes, modular wall panels may feature factory-applied finishes or protective coatings. Understanding your wall type helps determine whether repainting or only touch-up is required.
Know Your Wall Material
- Drywall: The most common wall material in modular homes, drywall typically needs a coat of primer before painting. This helps the paint stick properly and provides a more even finish.
- Plywood or Paneling: These surfaces frequently feature a textured appearance. Prior to painting, it may be necessary to sand them to achieve a smoother finish. Additionally, they could demand a specific kind of paint or primer to ensure proper sealing.
For steel-frame modular structures, wall panels may come pre-coated with durable finishes from manufacturers like SteelPRO PEB, reducing the need for frequent repainting.
Consider the Environment
- High Moisture Areas: If you’re painting a kitchen or bathroom, you’ll need a moisture-resistant paint. Look for paints with anti-mold or mildew properties to keep your walls from developing issues over time.
- Ventilation: Ensure the room is adequately ventilated during the painting process, particularly when utilizing oil-based paints or paints with potent odors. Keep windows open or employ fans to facilitate proper air circulation.
Gather Your Tools
- Brushes and Rollers: To achieve a seamless and uniform application of paint, employ a top-notch brush for precision work around the edges and a roller for broader surfaces. If you desire a quicker and more consistent finish in larger spaces, a paint sprayer might be a viable option.
- Painter’s Tape: Safeguard moldings, baseboards, and ceilings from unintended paint splashes by applying painter’s tape.
- Drop Cloths: Shield your floors and furnishings from paint spills by spreading out drop cloths. This proactive measure will significantly reduce the time spent on post-painting cleanup.
- Ladder: If your walls have high spots or you’re painting ceilings, a ladder will help you reach those areas safely.
By understanding these details and properly preparing, you’ll set yourself up for success before starting your paint job.
Preparing Your Modular Home Walls for Painting
Before diving into painting your modular home walls, proper preparation is key to achieving a smooth, lasting finish:
Step 1: Cleaning the Walls
- Stains or Dirt: Should your walls exhibit dirt or stains, it is imperative to clean them using a gentle detergent or cleaning agent. In the case of stubborn stains, apply a stain-blocking primer to conceal them prior to painting.
- Holes or Cracks: Employ wall filler or spackle to fill any holes or cracks present. After it has dried, sand the area until it is smooth, ensuring it integrates seamlessly with the surrounding wall.
- Surface Imperfections: For uneven surfaces or dents, consider applying joint compound to level them out. This will give you a smooth base for painting and prevent imperfections from showing through.
Step 2: Priming the Walls (Is It Necessary?)
- New or Unpainted Walls: If your modular home walls are bare or made of unfinished drywall, a primer helps the paint bond better and provides a smooth surface.
- Stains or Discoloration: If your walls have any stains (e.g., water damage or grease), a stain-blocking primer will ensure these spots don’t show through the new paint.
- Darker Colors: When painting with lighter colors over dark shades, using a primer helps you achieve a more uniform finish without having to apply multiple coats of paint.
If your walls are in good condition and you’re just refreshing the paint with a similar color, you can skip the primer and go directly to painting.
Step 3: Choosing the Right Paint for Modular Walls
- Oil-based Paints: Renowned for their durability and ability to provide a sleek, hard finish, oil-based paints are an excellent option for high-traffic areas as they aid in stain prevention. Nevertheless, they come with a more potent odor, necessitate a longer drying period, and require a solvent (such as mineral spirits) for cleanup.
- Water-based (Latex) Paints: These paints are the most prevalent selection for interior walls in modular homes. They dry rapidly, emit less odor, and can be easily cleaned up using only soap and water. Water-based paints are well-suited for the majority of indoor spaces, offering a harmonious blend of durability and user-friendliness.
Recommended finishes: Matte, satin, or glossy?
- Matte Finish: Ideal for concealing wall flaws and achieving a gentle, sophisticated aesthetic. It is particularly suitable for low-use areas such as bedrooms or living rooms, though it may pose challenges in terms of cleanliness.
- Satin Finish: Provides a subtle sheen and facilitates easy cleaning. It is an excellent choice for high-traffic zones like kitchens, bathrooms, and hallways, where increased wear and tear are anticipated.
- Glossy Finish: This finish gives a high-shine look and is extremely durable. However, it can highlight imperfections, so it’s best used for accent walls or trim rather than entire rooms.
For modular or prefabricated buildings, consider factory-applied coatings such as powder coating or polyurethane systems. Manufacturers like SteelPRO PEB offer pre-painted modular panels that ensure consistent color, superior adhesion, and weather resistance compared with traditional on-site painting. These long-lasting paint systems are ideal for modular classrooms, container offices, and educational buildings, where extended durability and low maintenance are essential.
Painting Your Modular Home Walls
Choosing the Right Tools
Brushes excel in tackling edges, corners, and smaller spaces like trim or areas around windows. Opt for a high-quality angled brush to achieve a neat finish when cutting in along edges. Brushes offer the precision required for detailed or intricate regions.
Rollers are best for large, flat surfaces, such as walls. They cover larger areas quickly and provide a smooth, even coat. Rollers with shorter naps are good for smooth drywall, and longer ones are good for rougher surfaces.
For the perfect finish on large areas or with minimal texture, a paint sprayer works well. It provides a smooth, even coat with no brush or roller marks. However, it requires more setup and cleanup time. Sprayers work best for smooth, well-prepped walls.
For modular panels that are factory-coated, only minor touch-up work may be needed at seams or installation joints, as the main surfaces are already pre-painted under controlled factory conditions.
How to Paint Evenly
Cut in: Initiate the painting task by utilizing a brush to coat the edges, encompassing ceilings, corners, trim, and baseboards. This particular action is termed “cutting in.” Once this phase is accomplished, you can then transition to painting the more expansive surfaces.
Rolling walls: Use a roller to paint in a “W” or “M” pattern, which helps to evenly apply the paint without leaving streaks. Don’t overload the roller – dip lightly and roll off any excess. Apply paint to overlapping areas to prevent the appearance of noticeable lines.
Keep a wet edge: Divide the painting area into sections and maintain a “wet edge” while working to eliminate visible lines or streaks. Should the paint begin to dry before you proceed to the next section, seam marks will be evident at the points where the paint overlaps.
Multiple coats: If necessary, apply a second coat once the first one has dried. Lightly sand between coats to address any imperfections, and remember to clean your tools thoroughly after each use to prevent residue buildup.
Maintaining even coating thickness is critical — a standard closely monitored during factory spray applications for modular wall panels, ensuring consistent appearance and long-term adhesion.
How long does it take for paint to dry?
Drying time: Water-based paints typically dry in 1-2 hours, but can take 4-6 hours to dry completely, depending on humidity and temperature. Applying a second coat of oil-based paint typically requires a longer waiting period, usually ranging from 6 to 8 hours after the initial coat has dried.
Curing time: Even after the paint feels dry, it can take 7-10 days to fully cure. During this time, avoid excessive contact with the painted surface to prevent marks or smudges.
In industrial modular construction, controlled environments speed up drying and curing, ensuring uniform adhesion — a process typical in factory-applied coatings, which minimizes inconsistencies caused by temperature or humidity variations.
Common Mistakes to Avoid When Painting Modular Home Walls
While painting your modular home walls can be a great DIY project, certain mistakes can lead to poor results. Here’s how to avoid them:
Mistake 1: Skipping the Primer
Skipping the primer can cause the paint to peel, fail to adhere properly, or allow stains to show through. Without primer, the paint won’t bond well, leading to uneven coverage. If you’ve skipped it, lightly sand the surface and apply a coat of primer before repainting to improve adhesion and ensure a smoother finish.
Mistake 2: Over-Applying Paint
Overloading the roller or brush with paint can cause drips, streaks, and uneven coverage. To avoid this, dip your roller or brush lightly into the paint and roll off the excess. Apply paint in thin, uniform layers, allowing each coat to dry thoroughly before applying the next one. This approach ensures a smooth, streak-free finish.
Mistake 3: Not Ventilating Properly
Proper ventilation is essential to prevent fumes from building up and slowing down the drying process. Without good airflow, the paint may take longer to dry, and fumes can cause health issues. Open windows and use fans while painting, and continue ventilating the room after to help the paint dry and cure properly.
In large-scale modular projects, poor ventilation can also affect paint curing. SteelPRO PEB’s factory-controlled environments ensure consistent coating performance and air quality, reducing the risk of uneven finishes or prolonged drying times during modular wall production.
Maintaining Your Painted Walls in a Modular Home
Proper maintenance will keep your modular home walls looking fresh and vibrant. Here’s how to care for your painted walls:
Cleaning Painted Walls
Regular cleaning is essential, but avoid damaging the paint. Combine a gentle dish soap with water and employ a soft cloth or sponge to delicately clean the walls. Avoid using abrasive cleaning agents or scrubbers that have the potential to scratch or dull the paint. For more stubborn stains, utilize a non-abrasive cleaner specifically formulated for painted surfaces. Always conduct a preliminary test on a small, inconspicuous area to confirm that it won’t damage the finish.
Touching Up Paint
Walls may develop scuffs or chips over time, so touch-ups will help maintain their appearance. If you have surplus paint remaining, utilize it for touch-up tasks or visit a paint store to have the color matched for future use. Clean the area first, lightly sand rough spots, then apply a thin coat of paint with a small brush. If an additional layer is required, allow the paint to dry completely before applying it. This ensures seamless blending with the rest of the wall.
Factory-Applied Coating Maintenance
Factory-applied coatings on modular wall systems require minimal maintenance. These finishes are designed to withstand UV exposure, moisture, and corrosion, making them especially suitable for modular classrooms, offices, and residential units.
An annual inspection and minor touch-up are typically sufficient to extend the coating’s life beyond 20 years. Unlike conventional on-site paint, factory-applied coatings offer superior adhesion and consistency, reducing long-term maintenance costs and ensuring a durable, professional finish.
This makes them ideal for long-lasting modular and PEB structures used in educational facilities, workspaces, and living environments.
Factory-Coated & Customizable Modular Wall Systems by SteelPRO PEB
After learning how to paint modular home walls, many homeowners and project managers wonder how to make their wall finishes last longer with less maintenance. That’s where factory-applied coatings make a real difference.
At SteelPRO PEB, each modular wall panel is treated in a controlled production environment, ensuring even coating thickness, strong adhesion, and protection against UV, moisture, and corrosion. This industrial-grade process means the color and surface quality you see on day one can endure for decades without peeling or fading.
Unlike on-site painting, factory coating minimizes human error and ensures uniform results across every panel—ideal for modular schools, offices, and residential units where both aesthetics and longevity matter. Every system is professionally engineered and certified, providing a level of durability and reliability that DIY methods can’t match.
If you want customizable, low-maintenance modular wall solutions built to professional standards, contact SteelPRO PEB today for a direct-from-factory consultation and quotation.
Can modular walls be painted with regular house paint?
Yes, but with limitations. While most modular walls can hold standard paints, household products often lack the adhesion and durability needed for modular or steel surfaces. For longer-lasting results, factory-applied or industrial-grade coatings are recommended.
What type of coating is best for modular or container buildings?
The most durable solutions are powder coatings and polyurethane systems, which form a strong, weather-resistant layer. These are typically applied in controlled factory environments, such as those used by SteelPRO PEB, ensuring uniform protection and color consistency.
Are custom colors available for modular wall panels?
Yes. Modular wall panels can be finished in custom RAL or Pantone colors, allowing architects and owners to match branding or aesthetic requirements. Factory application guarantees accurate color reproduction and long-term vibrancy.
How long does a factory-coated modular wall finish last?
A properly maintained coating can last 20 years or more, depending on environmental conditions. Factory coatings resist corrosion, fading, and moisture better than on-site paints, minimizing repainting costs and downtime.