There’s something deeply satisfying about watching your hens peck contentedly in their coop or discovering that first warm egg in the nesting box. But let’s be honest—building a safe, functional home for your flock isn’t just about charm; it’s about outsmarting crafty raccoons, battling weather extremes, and avoiding zoning violations. Whether you’re a DIY enthusiast eager to craft a rustic wooden haven or a time-strapped beginner opting for a sleek prefab metal kit, this guide meets you where you are.
We’ll walk through two fail-proof approaches: the hands-on joy of constructing a customized wooden coop (complete with predator-proofing hacks) and the streamlined efficiency of assembling a galvanized steel kit. You’ll learn how to size vents for optimal airflow, slope roofs to defy downpours, and anchor structures against burrowing foxes—all while keeping costs in check. By the end, you’ll have more than a coop; you’ll have peace of mind knowing your feathered friends are thriving in a space as resilient as your dedication to them. Let’s build something that lasts!
What to Know Before Building a Chicken Coop
Imagine your chicken coop as the very first step on your poultry adventure. Taking care of the essentials will guarantee that your hens are content and that you have fewer problems to deal with!
1. Legal & Financial Groundwork
Local regulations: Many areas restrict coop size, placement (e.g., 50+ feet from neighbors), or flock size. Contact your zoning office—avoid fines or rebuilds later.
Budget: A DIY wooden coop costs $300-$800; prefab metal kits range from $1,200-$3,500. Factor in hidden expenses like predator-proofing mesh ($40/roll) or automatic waterers ($25-$60).
2. Space & Flock Planning
Available land: Measure your yard. For 6 chickens, you’ll need at least 24 sq ft indoors (e.g., 6’x4’) + 60 sq ft outdoors.
Future-proofing: Planning to expand? Leave room for extra nesting boxes or a larger run.
3. Climate & Material Choices
Hot climates: Use reflective metal roofs and shade cloths. Avoid dark wood—it absorbs heat.
Cold climates: Insulate walls with foam boards (R-value 5+) and seal drafts.
Material durability: Pressure-treated wood resists rot but needs sealing; galvanized steel lasts 20+ years with zero maintenance.
4. Security Essentials
Predator threats: Raccoons? Install raccoon-proof latches. Hawks? Add overhead netting. Digging foxes? Bury hardware mesh 12” deep around the perimeter.
5. Functional Design Features
Ventilation: Install two 6”x12” mesh-covered vents near the roof—stagnant air breeds disease.
Lighting: Add a solar-powered LED strip (10-15 lumens) for winter egg production.
Feeders & waterers: Hanging metal feeders prevent spillage; nipple waterers reduce contamination.
Overlooking these steps risks wasted money, unsafe chickens, or even legal issues. A well-planned coop isn’t just a shelter—it’s a lifeline.
How to Build a Chicken Coop
From hammering nails in a rustic DIY wooden coop to snapping together a sleek prefab chicken coop, here’s how to create a safe haven for your flock—no guesswork needed.
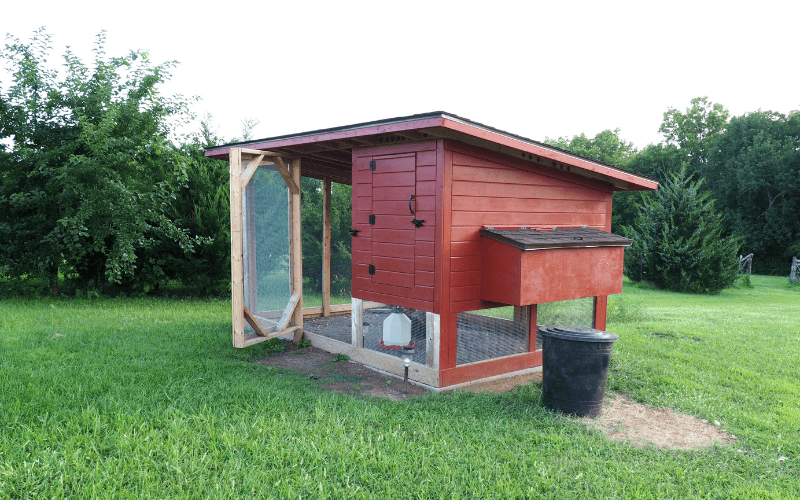
Option 1: DIY Wooden Coop (8-Chicken Example)
Perfect for hands-on builders who love customization!
1. Plan & Design
“Where will the nesting boxes go?” Sketch a 6’x4’ coop with a 3’x4’ run, ensuring 4 sq ft per chicken indoors. Slope the roof at 15° for rain runoff. Label key areas: nesting boxes, perches, and wire-mesh windows.
2. Gather Materials
Essential Tools:
- Circular saw, tape measure, hammer, drill, staple gun, and safety goggles.
- Level, carpenter’s square, and chalk line for precise alignment.
Structural Materials:
- Lumber: 14 pressure-treated 2×4 pine boards (8’ length) for framing (resists rot; avoid cedar for cost efficiency).
- Walls: 2 sheets of ½” exterior-grade plywood (rated for moisture resistance).
- Roof: Corrugated PVC panels (lightweight) or asphalt shingles (durable).
Hardware & Extras:
- Fasteners: 3” galvanized nails, 2.5” deck screws, and rust-proof hinges.
- Wire mesh: ¼” galvanized hardware cloth (windows/vent covers) + ½” mesh for run fencing.
- Door hardware: Sliding bolt latch and 24”x30” plywood door.
- Sealant: Exterior-grade wood preservative (e.g., Thompson’s WaterSeal).
3. Build the Foundation
Step 1: Mark & Excavate
Begin by outlining an area 6 inches wider on all sides than your coop’s base. For example, a 6’x4’ coop requires a 6.5’x4.5’ trench. Use stakes and string to mark the perimeter. Dig a trench 4–6 inches deep with a shovel. In soft or uneven soil, excavate deeper (8–10 inches) and fill the bottom with compacted gravel to stabilize the ground.
Step 2: Level & Prepare
Compact the soil with a hand tamper, then add a 2-inch layer of crushed stone (¾” diameter) for drainage. If your site slopes, create a retaining border using pressure-treated 2×6 boards to prevent erosion. Use a 4-foot level to ensure the base is flat—even a slight tilt can warp the coop over time.
Step 3: Assemble the Base Frame
Construct a rectangular frame with four pressure-treated 2x4s cut to match your coop’s dimensions. Secure corners with galvanized steel brackets (3”x3”) and check for squareness by measuring both diagonals—they should match exactly.
Step 4: Anchor the Frame
Drive 12-inch steel spikes through pre-drilled holes at each corner. For permanent setups, opt for concrete footings: dig holes 12 inches deep, pour concrete, and embed J-bolts to secure the frame. This method resists frost heave in cold climates.
Step 5: Fill & Protect
Pour 2 inches of gravel inside the frame to deter weeds and pests. In termite-prone areas, lay landscape fabric beneath the gravel. Slope the gravel 1° away from the coop to divert rainwater.
Material Options Explained
- Crushed Stone
Affordable and drains well. Use angular ¾” gravel—it locks together better than rounded pebbles. Avoid sand, which attracts burrowing animals. - Concrete Slab
Ideal for heavy or mobile coops. Pour a 4-inch slab with wire mesh reinforcement. Cost: ~$150 for a 6’x4’ slab. - Pressure-Treated Wood Skids
For movable coops, use two 6’ 4×4 beams as skids. Soak them in borate solution to repel termites.
Pro Tips
- Frost Protection: In cold regions, dig footings below the local frost line (typically 12–36 inches deep). Check municipal codes for exact requirements.
- Sloped Sites: Terrace the area with retaining walls or build a raised foundation using concrete blocks.
- Termite Defense: Spray wooden components with borate solution before assembly—it’s non-toxic to chickens but lethal to insects.
4. Assemble Walls & Frame
Structural Integrity First: Begin by nailing vertical 2×4 studs (8′ length) every 16 inches along the base frame—this “16-inch on-center” spacing balances strength and material efficiency. Use a carpenter’s square to ensure 90° angles.
Window Installation: Cut 12”x12” openings on two opposing walls using a jigsaw. Staple ¼” galvanized wire mesh tightly across the gaps, then secure edges with 1×2 cedar trim (rot-resistant) and 1” exterior screws.
Door Framing: Reinforce the 24”W x 30”H door gap with double 2×4 studs on both sides. Mount heavy-duty barn hinges to a custom-cut plywood door (¾” thickness), ensuring a ⅛” gap around the edges for smooth operation.
Pro Tip: Pre-drill holes in studs to prevent splitting. For windy areas, add diagonal 2×4 braces at corners.
5. Add Roof & Ventilation
Roof Framing: Install 2×4 rafters spaced 24 inches apart across the coop’s width, secured to the top plates with 3” galvanized nails. Nail ½” exterior-grade plywood sheathing to the rafters, ensuring seams align with rafter centers for maximum strength.
Roofing Installation: Lay corrugated PVC panels (26” wide) horizontally, overlapping each sheet by 6”. Secure with rubber-gasketed screws every 12” along the ridges. For asphalt shingles, start at the eaves and stagger rows by 6”.
Ventilation Gap: Leave a 2-inch continuous gap along the roof peak. Cover it with ¼” galvanized wire mesh, stapled to the interior side and sealed with silicone caulk to block drafts. Add a removable plexiglass strip above the mesh in snowy climates to regulate airflow.
Slope the roof 1 inch per foot (e.g., 6” rise for a 6’ span) for optimal drainage. Pre-drill roofing panels to prevent cracking.
6. Final Touches
- Nesting boxes: Mount three 14”x12” wooden crates 18” off the floor.
- Perches: Install a 2×2 pine board 12” below the ceiling.
- Predator-proofing: Bury wire mesh 12” deep around the run and staple it to the coop’s base.
While wood it offers affordability and customization, it requires annual sealing to prevent rot.
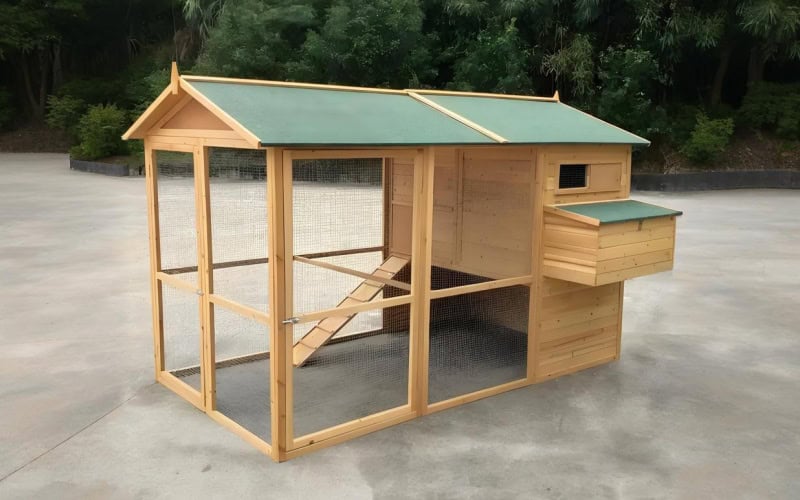
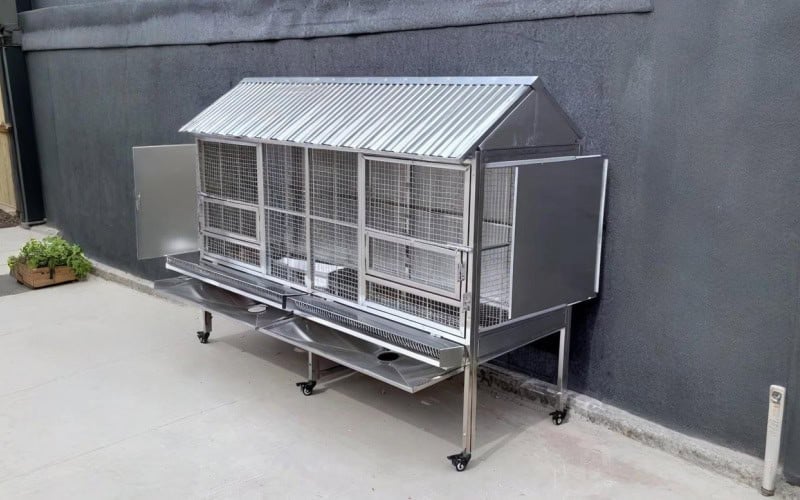
Option 2: Prefab Chicken Coop (10-Chicken Metal Kit)
Ideal for beginners craving durability and speed!
1. Unbox & Organize
Your prefab chicken coop kit includes:
- Galvanized steel frame (pre-cut beams labeled A1, A2, etc.).
- Powder-coated wall panels with pre-drilled holes.
- Sliding door, bolt/nut packs, and a 5’x8’ welded-wire run.
2. Prepare the Site
Clear a 10’x6’ area, lay landscape fabric, and spread 3” crushed stone. Use a 4’ level to check flatness—add sand to low spots.
3. Assemble the Frame
Step 1: Erect Vertical Columns
Slot galvanized steel columns (labeled A1, A2, etc.) into pre-welded base connectors. Align the notches and push firmly until you hear a click. Use a magnetic level to ensure columns are perfectly vertical.
Step 2: Connect Horizontal Beams
Bolt pre-cut steel beams (labeled B1, B2) to the columns using galvanized bolts. Tighten with a 10mm torque wrench to 15 ft-lbs—avoid over-tightening, which can warp the powder coating.
Step 3: Install Purlins
Attach C-shaped steel purlins (2” depth) horizontally across the roof beams at 24” intervals. Secure with self-drilling screws (½” length) and reinforce critical joints with spot welds (if your kit includes weld-ready brackets).
Pro Tips:
- Wipe all joints with lubricant (e.g., silicone spray or machine oil) before assembly to prevent squeaks.
- For extra rigidity, add diagonal braces (included in some kits) between columns.
4. Attach Panels & Roof
Wall Panel Installation
Begin by aligning corrugated steel wall panels vertically against the frame. Hook the panel’s grooves onto the T-brackets pre-installed on the steel beams—listen for a snap to confirm proper seating. Secure each panel with self-drilling screws (1” length) driven through the raised ribs into the frame. Overlap adjacent panels by 1.5” to prevent gaps and ensure weather resistance. For corners, notch the panels with tin snips to create clean edges, then seal seams with silicone caulk to block drafts.
Roofing Process
Lay the first corrugated metal roof panel at the eaves, allowing a 2-inch overhang to direct rainwater away from the walls. Overlap subsequent panels by 1 full corrugation (about 1.25”) to channel water downward. Fasten panels to the purlins using rubber-gasketed screws—drive them into the panel’s peaks, not valleys, to avoid leaks. At the roof peak, install a ridge cap (included in most kits) and seal its edges with butyl tape for airtight protection.
Door & Window Finishing
Slide the pre-hung metal door into its upper track, then lower it into the bottom groove. Adjust the track’s slope with plastic shims until the door glides smoothly. For windows, press-fit acrylic panels into their frames and secure with spring clips (provided). Apply a ¼” bead of silicone sealant around all openings to deter pests and moisture.
Vents: Attach 6”x12” mesh vents near the roof for airflow.
6. Pro Tips for Longevity
- Anti-rust hack: Spray bolt threads with clear acrylic sealant.
- Winter prep: Add removable PVC strip curtains over vents to retain heat.
Why choose a prefab metal shed chicken coop? Zero rot, termite-proof, and raccoon-resistant. Assembles in 6 hours vs. 30+ hours for DIY wood.
Premium Prefab Chicken Coop Solutions
Engineered for Durability, Designed for Convenience
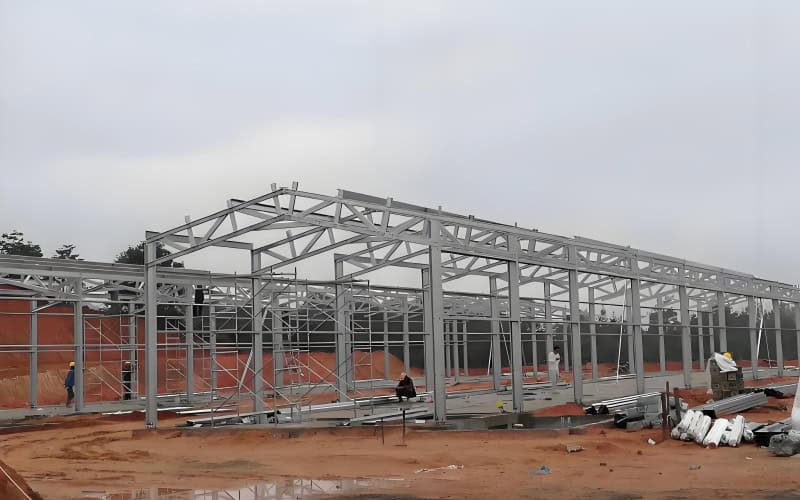
As a leading manufacturer of metal chicken coops, we deliver turnkey poultry housing solutions that redefine reliability. Our prefab chicken coops—including walk-in designs with full-standing height, greenhouse-style hybrids with tempered glass panels, and steel structure poultry buildings for large-scale commercial flocks—are crafted from galvanized steel walls and corrugated metal roofing. These structures eliminate rot, leaks, and pest infestations, backed by a 25-year weatherproof guarantee. Whether you’re housing 12 backyard hens or 500 free-range layers, our modular chicken coop systems adapt to your scale with bolt-on expansions and customizable accessories like automatic feeders.
Expert Support, Every Step
Choosing our metal roof chicken coop means more than durability—it’s peace of mind. Our team provides live video assembly guidance to help you position purlins, secure wall panels, and install predator-proof latches remotely. From compact urban setups to large modular chicken coops for farm buildings, we equip every kit with pre-drilled components and color-coded instructions. Ready to upgrade? Your flock deserves fortress-grade protection—we make it achievable in one weekend.